REST API
Complete guide to Shoporama's REST API: authentication, all endpoints, examples and Swagger documentation.
Just want to manage the store—not write code?
If you don’t need to build a custom integration but just want an AI to help you with day-to-day operations, Shoporama’s Claude integration is typically a better option. It uses the same data as the REST API but requires no coding—and it’s secured with OAuth.
Overview
Shoporama’s REST API lets you integrate your online store with external systems—ERP, inventory management, PIM, CRM, and other services. The API supports CRUD (create, read, update, delete) operations on most resources in your online store.
Documentation
You can find the full API documentation, including all endpoints, parameters, and examples, in our interactive Swagger documentation:
Open the Swagger documentation
Here you can test API calls directly in your browser and view all available fields and parameters for each resource.
Get Started
- Go to Integrations → API Access in your Shoporama admin panel
- Create a new API key
- Select permissions for the key: All, Read-only, or Write-only. The permission applies to the entire key, not to individual resources
- Use the key in the Authorization header of your API calls

Authentication
Add your API key to the Authorization header. You can either send the key directly or use the Bearer format:
Authorization: YOUR-API-KEY
# Or with Bearer:
Authorization: Bearer YOUR-API-KEY
Available Resources
The API provides access to the following resources. All endpoints are accessible at https://dinshop.dk/REST/:
Products and Catalog
- /product — Products (with variants, images, prices, categories, custom fields)
- /category — Categories
- /brand — Brands
- /manufacturer — Manufacturers
- /supplier — Suppliers
- /product-label — Product labels
- /profile, /profile-attribute, /profile-attribute-value — Product profiles, attributes, and values
Inventory
- /stock — Inventory and entries
- /batch — Stock Batches
Orders and Customers
- /order — Orders
- /order/{id}/create-label — Create a shipping label for an order
- /order/{id}/download-label — Download shipping label
- /order-queue — Order queue
- /order-label — Order labels
- /order-return — Returns
- /customer — Customers
- /customer-field — Customer fields
- /voucher — Discount codes and gift cards
Content
- /page — Static pages
- /blog-post — Blog posts
- /landing-page and /landing-page-item — Landing pages and items. GET /landing-page/{id} now returnsthe page’srules andmatch type directly in the response, so you don’t need to make a separate call to /landing-page-item
- /menu — Menus and navigation
Newsletter
- /newsletter-list — Newsletter lists
- /newsletter-subscriber — Subscribers
- /newsletter-campaign — Campaigns
Setup
- /shipping — Shipping Methods
- /payment_gateway — Payment methods
- /country — Countries
- /redirect — URL Redirects
- /webhook — Webhooks
Theme Files
- /theme-file — Read, create, update, and delete files in your themes. Requires that "Access to theme files" is enabled on the API key
HTTP Methods
- GET — Retrieve a list or a single resource
- POST — Create a new resource
- PUT — Update an existing resource
- DELETE — Delete a resource
Examples
Retrieve products:
curl -H "Authorization: YOUR-API-KEY" \
https://dinshop.dk/REST/product?limit=10
Create a product:
curl -X POST -H "Authorization: YOUR-API-KEY" \
-H "Content-Type: application/json" \
-d '{"name": "New product", "price": 199.00}' \
https://dinshop.dk/REST/product
Update inventory:
curl -X PUT -H "Authorization: YOUR-API-KEY" \
-H "Content-Type: application/json" \
-d '{"count": 50}' \
https://dinshop.dk/REST/stock/123
The number in the path is the product ID, and ` count ` is the new total inventory.
Filtering and paging
List endpoints support the following query parameters:
- ?limit=25 — number of results per page. The upper limit depends on the endpoint (e.g., 250 for /product) and is specified in the Swagger documentation
- ?offset=0 — skip results (for paging)
- ?search=text — free-text search
- ?fields=name,price — limit the fields returned
- ?last_modified=2026-01-01 — only resources modified since this date
Webhooks
You can create webhooks via the API so that your system is automatically notified when changes occur. Upon creation, you’ll receive a secret used to verify webhook calls via HMAC.
Response Codes
- 200 — Success
- 201 — Resource created
- 204 — Update/delete successful
- 400 — Invalid request
- 401 — Unauthorized (incorrect or missing API key)
- 403 — The key is valid but does not have permissions for the action (e.g., a Read-Only key attempting to write)
- 404 — Resource not found
- 429 — Too many calls (rate limit)
API log: see what’s actually being called
Each API key has its own log of incoming calls. This is the tool you should use when an integration behaves differently than expected, because the log shows what actually reached your store, not what the external provider thinks is being sent.
How to find the log
- Go to Integrations → API Access
- Find the key in the list that the integration uses
- Click the View Log button for that key
The log always belongs to a specific key, and there is no consolidated log across all keys. That’s why it’s a good idea to create one key per integration with a descriptive name, so you can see exactly what each service is doing. At the top of the page, you’ll see the key’s name, the key itself, and the number of entries.
The log shows
- Time: how long ago the request was received, e.g., “3 hours ago.” Hover your mouse over it to see the exact date and time down to the second
- Method: GET, POST, PUT, DELETE, or PATCH, displayed as a colored icon
- Path: the endpoint that was hit, without the domain, e.g., product or order/3658
- Parameters: the query string of the call, e.g., limit=50&offset=0. The field is empty if the call had no parameters, and very long strings are truncated
- IP: The sender’s IP address
- User agent: the program that made the call, e.g., a command-line tool or the integration’s own client name. Hover over it to see the full value
Sort, filter, and search
You can sort by Time, Method, Path, and IP by clicking on the column header. The most recent calls appear at the top by default. The values in the Method, Path, IP, and User agent columns are also clickable and act as shortcuts:
- Click a method to view only, for example, all PUT calls. The filter appears at the top of the page and can be removed by clicking the X
- Click a path to search for all calls leading to that endpoint
- Click an IP address to view everything that specific sender has done, or click a user agent to view all calls from the same program
The search field searches paths, parameters, IP addresses, and user agents all at once. The number of entries at the top of the page updates based on the filter, so you can use it as a counter. You can display 25, 50, 100, or 200 entries per page, and this setting is saved for the next time you open the log.
The log does not show this
The log is an overview of incoming calls, not a full technical trace. Three items are intentionally not stored:
- The response code: You cannot see whether a call ended with a 200 or a 404. You’ll need to check your own integration log for that
- The content of the call: the JSON you send with POST and PUT is not saved. The “Parameters” column only shows what comes after the question mark in the URL
- The response: The data returned by the API is also not stored
Calls that are rejected based on the key itself are also not included in the log. If a call is rejected with a 401 because the key is incorrect, missing, or has been deleted, it is never associated with a key, and therefore there is no entry to log. Calls that result in a 403 (the key is not authorized to perform the requested action), 404 (unknown endpoint), 405 (incorrect method), or 429 (daily limit reached), are, however, recorded in the log because the key was previously authorized.
The API log covers incoming calls to your store. If there are issues with webhooks—that is, outgoing calls from your store—they have their own log under Integrations → Webhooks.
How long are entries stored?
Entries in the API log are stored for eight weeks and then automatically deleted. This is also noted at the bottom of the log page itself. Eight weeks is plenty of time to troubleshoot an integration, but it means the log cannot be used as documentation for events from years ago. If you need a longer audit trail, it must be stored on the other end—that is, in the system making the call.
There’s a bonus to knowing this limit: the “Last Used” column on the API Access page is calculated based on the most recent entry in the log. If a key hasn’t been used for more than eight weeks, its last entry disappears, and the column displays a dash instead of a date. A dash therefore means “not used within the last eight weeks,” not necessarily “never used.” This is an effective way to identify old keys that can be safely deleted.
Troubleshoot an integration that isn’t behaving as expected
When an integration isn’t working as it should, the first question is always the same: Did the call even go through? The API log answers that in a matter of seconds, and its answer is independent of what the other system’s provider claims. Go through the steps in order.
Step 1: Did the calls even get through?
Open the log for the key the integration uses, and look at the timestamps during the time period when something should have happened.
- No entries at all: the problem lies on the other end. Either the integration isn’t making any calls at all, or the call is being rejected due to the key. Check that it’s configured with the correct key, the correct address for your store, and that the key hasn’t been deleted
- Lines up to a certain point, and then nothing: the integration stopped running at that point. Note the time. This is almost always exactly what you need to find the cause in the other system
- Entries all the way through: the calls are coming through, and the error lies in what’s being called. Proceed to step 2
If you have multiple keys, make sure you’re looking at the right one. The log is per key, and an empty log simply means that specific key hasn’t been used.
Step 2: Do the calls use the correct path and method?
Compare the Path and Method columns with what you expect:
- If you only see GET, the integration is reading data exclusively. If it’s also supposed to modify data, you’re missing POST (create) or PUT (update) calls
- If you see a path that doesn’t exist in the API, the endpoint is misspelled in the configuration. Such a call will return a 404, but you can only tell this from the path, since the log doesn’t show response codes
- If you see “product” where you expected “product/123,” the integration is fetching the entire list instead of the individual product. This isn’t necessarily an error, but it’s often the reason for high usage.
Sort by Path to group similar calls together. This makes it immediately obvious if a single endpoint accounts for the vast majority of calls.
Step 3: Is the integration sending the correct parameters?
The “Parameters” column reveals how the integration is actually configured. Typical things to look for:
- Is there a ` last_modified ` parameter? If it’s missing, the integration fetches everything every time instead of just what’s changed since the last request
- Are `limit ` and `offset` specified, and does the `offset` increment as expected? If it stays at 0, the integration is stuck on the first page and never sees the rest of your data
- Are there any filters you didn’t expect, such as a search or a restriction on fields?
Remember that the contents of POST and PUT calls aren’t saved. The log may show that an update was sent for product 123, but not what values were included in it.
Step 4: Is this the correct sender?
The IP and User Agent columns show who is using the key. If you don’t recognize the sender, the key is being used by something other than what you think—for example, an old test script, a former vendor, or a colleague who copied the key. Click on the IP address to see everything that specific sender has done.
This is also where you’ll discover if two systems are sharing the same key. If you see two different user agents using the same key, that means two systems are using it, and you won’t be able to distinguish their usage or shut down one without affecting the other. Create a separate key for each system.
Step 5: How often does it call?
Sort by Time and look at the interval between calls. Is the synchronization running every five minutes when it should be running once an hour? Is there a large cluster of calls every night? Filter by a method or search for an endpoint, and use the count at the top of the page as a reference.
If there are significantly more calls than expected, this is often the reason why the integration hits the daily limit and returns a 429 error. Read more in the article about API keys and daily limits.
For developers
The log entry is written the moment the key is authorized—that is, before the call is routed and before the daily limit is checked. This is why 403, 404, 405, and 429 errors appear in the log, while 401 never does. In other words, an empty log is in itself a useful indicator: the request either did not go through or was rejected during authentication.
Since neither the status code, request body, nor response body is stored, it’s a good idea to log the timestamp, method, path, and query string in your own client so that the two logs can be compared. At the same time, set a fixed, recognizable user agent on your calls. This is the only field in the log that you control yourself, and it makes it easy to distinguish your own script from third-party integrations, even when they share the same store.
What to Include When Contacting Support
If we’re going to look into this, it’ll go much faster if you have the following ready:
- The name of the key used by the integration. Send the name, not the key itself
- The exact time of a call that went wrong. Hover your mouse over the time in the log to see the date and time down to the second
- The path and method of the call
- What you expected to happen, and what happened instead
Frequently Asked Questions
I’m not technical. Do I even need to use the API log?
Not on a day-to-day basis. The log is a troubleshooting tool, not something you need to monitor constantly. But one thing you can always use it for is to check whether any calls are coming in from an integration right now. For example, if your shipping solution freezes, open the log for its key and look at the top line. If it says “2 days ago,” it’s the external service that’s stopped, not your store. That answer is often enough to get you moving forward.
Why can’t I see the response codes in the log?
The log stores the incoming call, not the response. If you need to troubleshoot error codes, you’ll need to log the response in your own client. The log is used to confirm that the call was received, to see which path and method it hit, and to identify the parameters it included. One exception is worth noting: calls rejected with a 401 status code do not appear in the log at all, so a completely empty log is in itself a strong indication that the key is incorrect or has been deleted.
Our inventory system has stopped updating. What should I do first?
Go to Integrations → API Access, click “Log Out” for the inventory system’s key, and look at the top line. If it says “3 days ago,” the system stopped three days ago, and the error lies with the inventory system. If it says “5 minutes ago,” the calls are coming through, and you should then move on to the Path and Parameters columns. Make a note of the time before contacting the vendor, as that’s the first thing they’ll ask for.
Can I view a consolidated log for all keys in the store?
No, the log is displayed per key. That’s exactly why it’s a good practice to create one key per integration with a descriptive name, such as “Inventory System” or “Price Monitor.” On the API Access page, you can sort by “Last Used” to quickly see which keys are actually active, and the “Daily Limit” column shows usage and the limit per key. If you need to compare usage across different systems, the overview is the right place to look, not the log.
Our accounting system posted an order incorrectly. Can I see in the log what was sent?
You can see that a call was sent, when, using which method, and to which path—for example, a PUT to order/3658. The actual content isn’t stored, so you can’t see which amounts or accounts were included. For that, you’ll need the attachment or the log in the accounting system. The log, however, can pinpoint the exact time, and that’s usually enough to find the correct entry on the other end.
The log shows calls every five minutes throughout the night. Is that a problem?
Not in and of itself, but it’s worth calculating. One call every five minutes adds up to just under 300 calls per day, and if the integration fetches multiple pages at a time, that number increases. This counts toward the key’s daily limit. Look at the “Parameters” column: if there’s no “last_modified” parameter included, the integration fetches the entire catalog every time, and then the vast majority of calls are wasted. Ask the provider to switch to fetching only changes since the last request.
Can I use the API log as documentation for my accountant?
No. Entries are automatically deleted after eight weeks, and the log contains neither amounts nor the content of the calls. It documents that a system called your store at a given time, not what was exchanged. For accounting documentation, you must use the orders in the store and the supporting documents in the accounting system.
Our price monitor says they update prices every hour, but the prices aren’t changing. How do I check this?
Open the log for the price monitor’s key and click on PUT in the Method column to filter by method. If there are no PUT calls at all, the service is read-only and does not write, regardless of what’s specified in its configuration. If there are PUT calls to product paths every hour, the updates will appear. First, check whether the key is set to Read-only, because in that case, write requests will be rejected with a 403 error even if the calls appear in the log. If the key is set correctly, you should investigate whether the correct products are being targeted, or if the prices are being overwritten by something else afterward.
Tip
Use the Swagger documentation to explore all endpoints and test API calls directly in your browser—it’s the easiest way to get started.
Need help with API integration? Contact us at support@shoporama.dk.
Related articles
What emails does Shoporama send to my customers?
Overview of automatic emails Shoporama sends to your customers - order confirmation, abandoned baskets, track-and-trace, product reviews, and more.
POS - Point of Sale
Learn how to use Shoporama's POS system to sell products in your physical store. Log in with your Shoporama account, scan barcodes, add products to...
Unsubscribe links in automatic emails
Give your customers the option to unsubscribe from automatic follow-up emails after purchases and product reviews - with a simple link in the email.
Related features
Headless commerce
Headless commerce separates frontend and backend via APIs. Learn what it is, the pros and cons, and when it makes sense for your webshop.
REST API
REST API is a standard for system communication over HTTP. Read about REST APIs, integrations and how webshops use them.
REST API - build exactly the integration you want
Full REST API with access to products, orders, customers and more. Build your own integrations, apps or a headless frontend.
Headless Commerce and OAuth
Use Shoporama as a headless backend with OAuth login and a comprehensive REST API. Build custom frontends, apps and integrations.
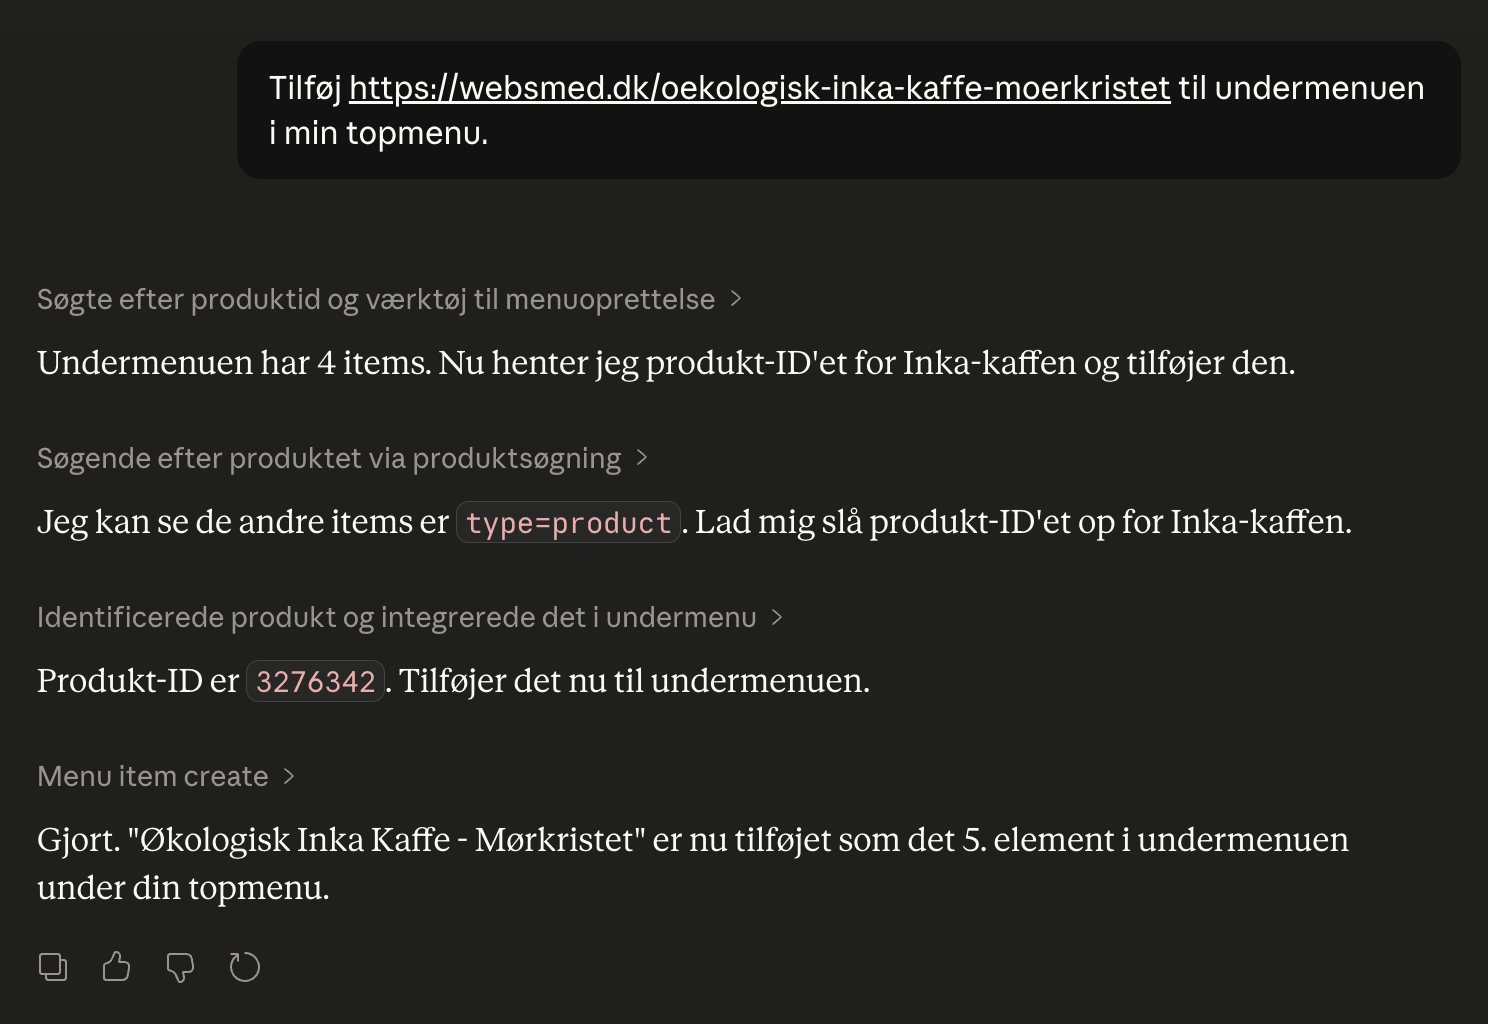
Webshop with Claude
Connect your Shoporama webshop with Claude and manage products, orders, campaigns and designs by typing in Danish. No code, full control, audit log.