The Delaware Theme: Configuration and Customization
A complete guide to Delaware and DelawareDK on your Shoporama online store: theme settings, footer, mega menu, colors, payment icons, Trustpilot, Instagram, and much more.
Delaware is one of Shoporama's free default themes. It’s modern, responsive, and built with Tailwind CSS, so it works great on both desktop and mobile. Virtually all aspects of its appearance and behavior can be customized from the Design section in the admin panel without writing any code. This guide walks you through the most important settings.
Two versions: Delaware is available as Delaware and DelawareDK. The features are the same. The difference is the language: Delaware has English default texts in the store and mostly English names for the theme settings, while DelawareDK has Danish texts and Danish names. Both run on Smarty 4. Where the names in the admin panel differ, DelawareDK’s name is listed in parentheses in this guide.
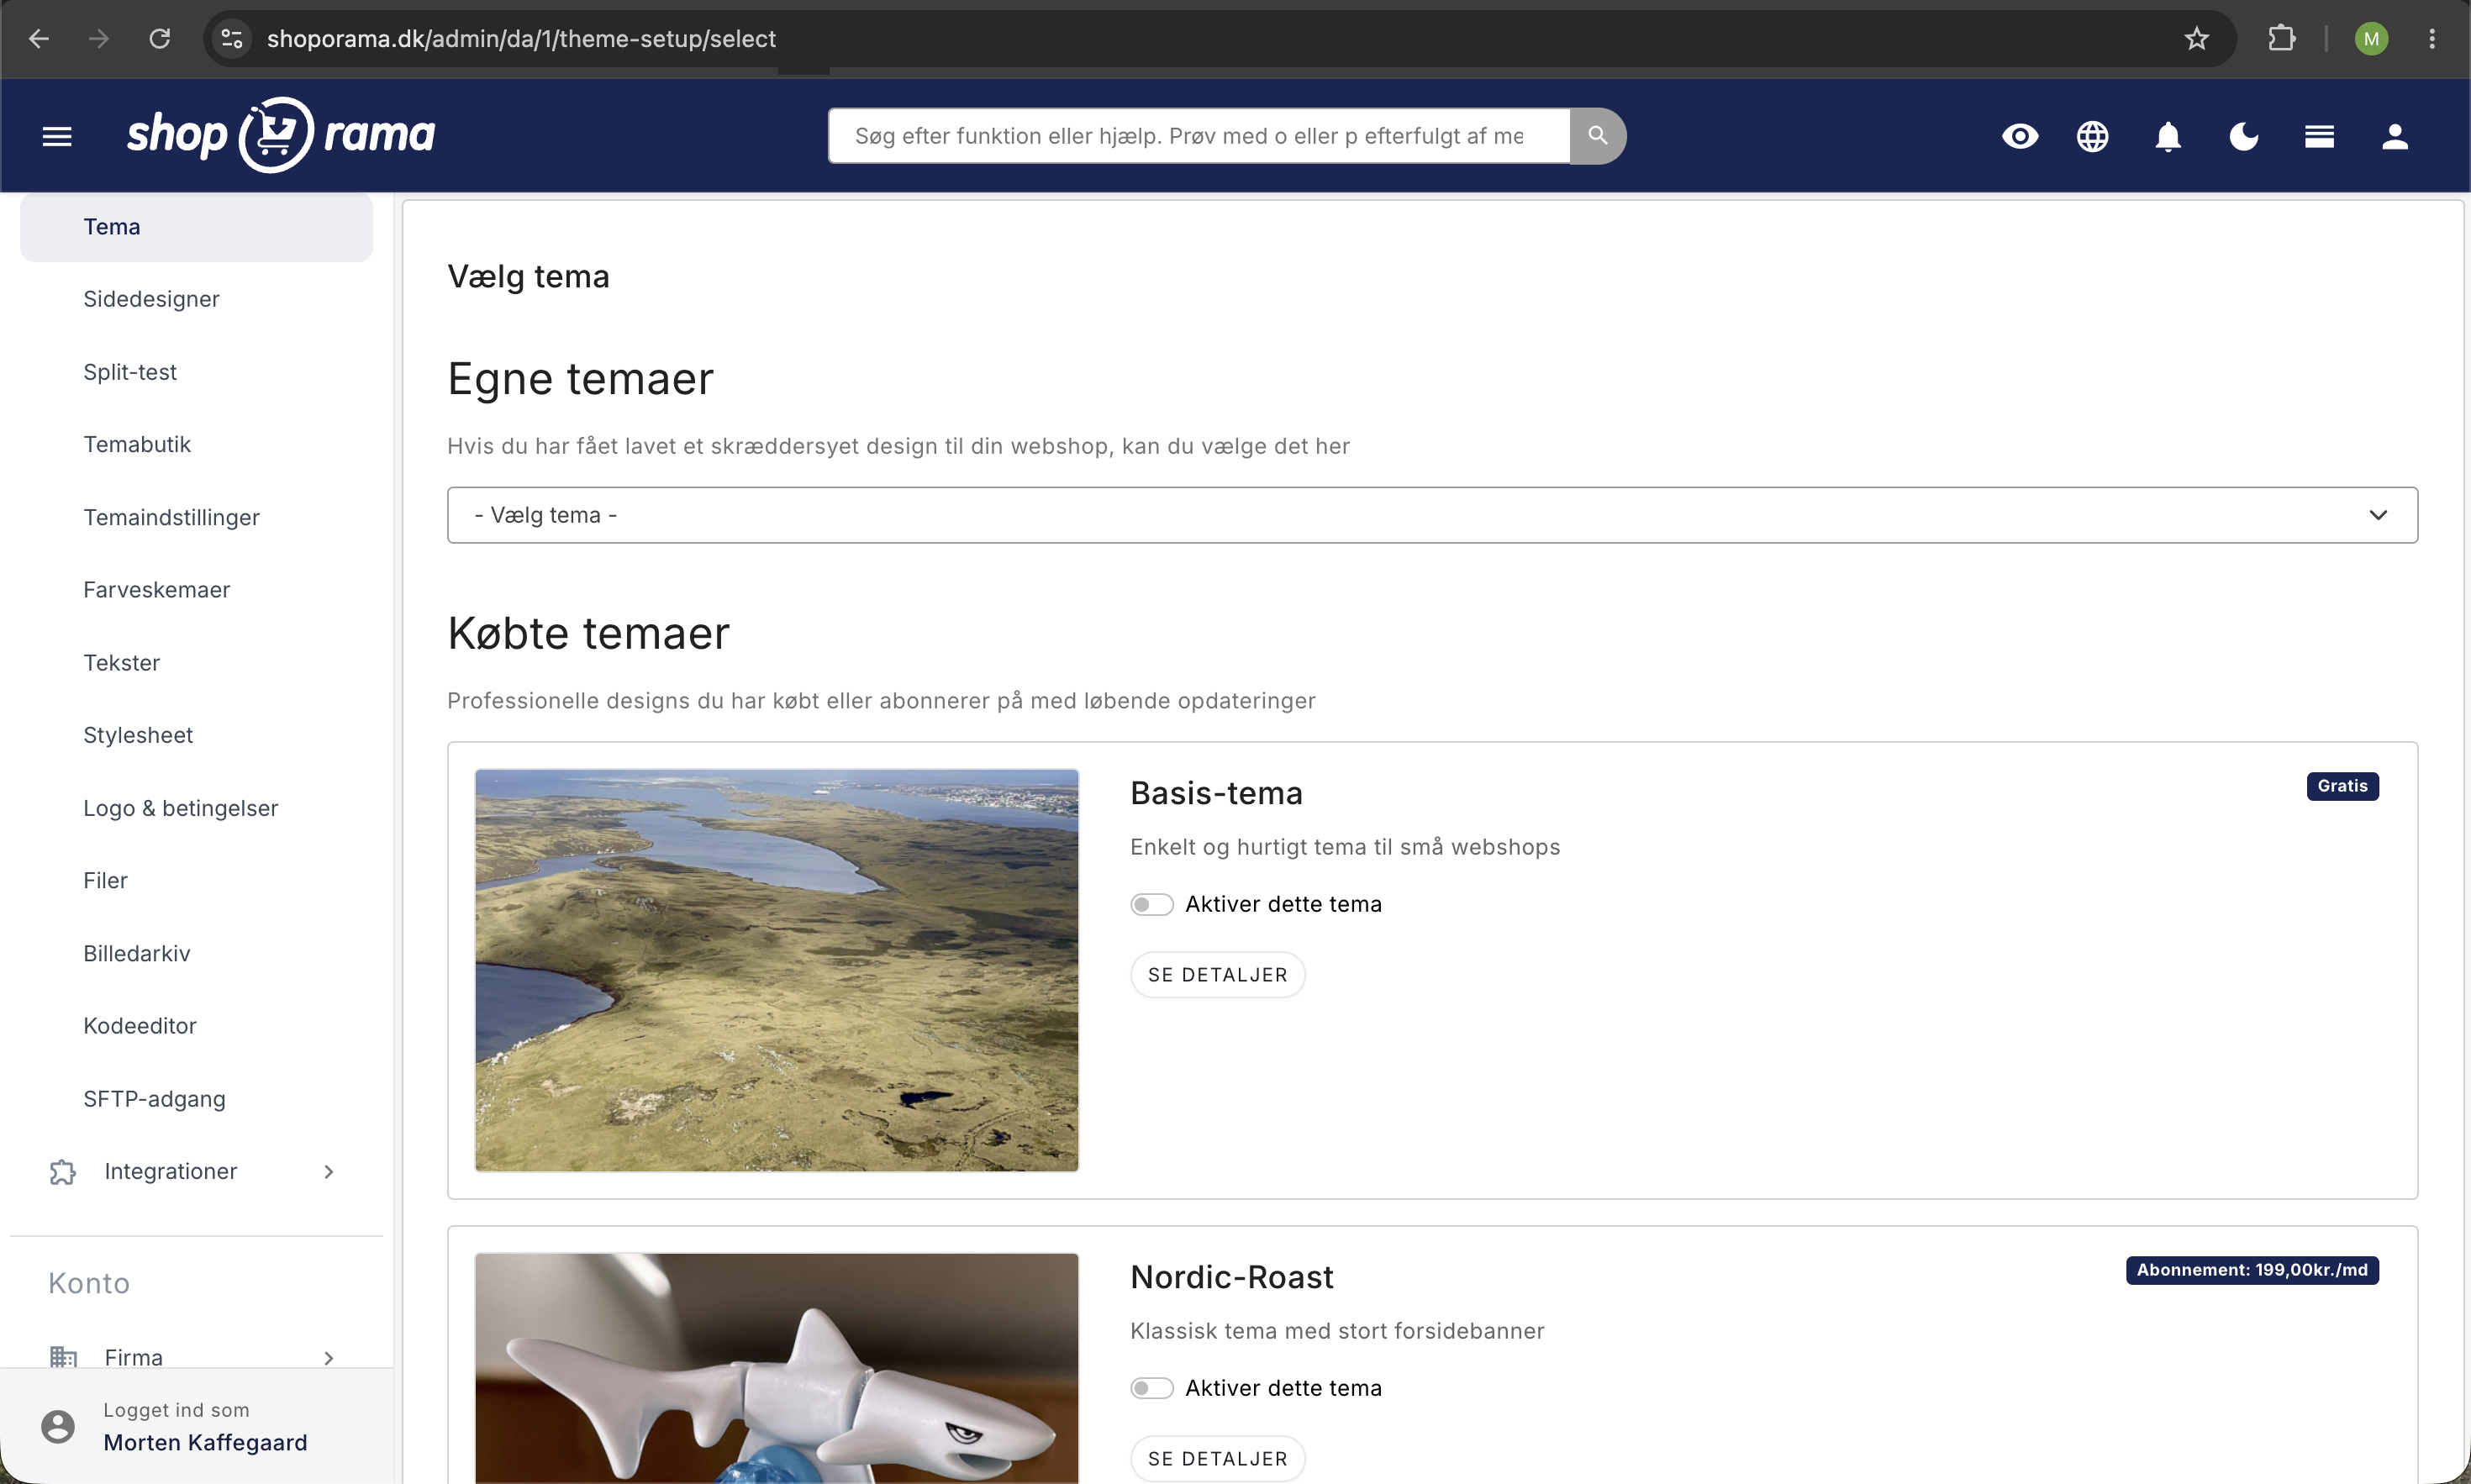
Where to Find the Settings
Almost everything is managed from Design → Theme Settings. The fields are grouped into sections, and the Overview panel on the right jumps directly to the section you click on, such as General, Company, Theme & Colors, Badges, Product, Checkout: General, Integrations, and Custom Code (Beta). Many fields have a short tooltip directly below the field. Save your changes using the Save and Continue Editing button.
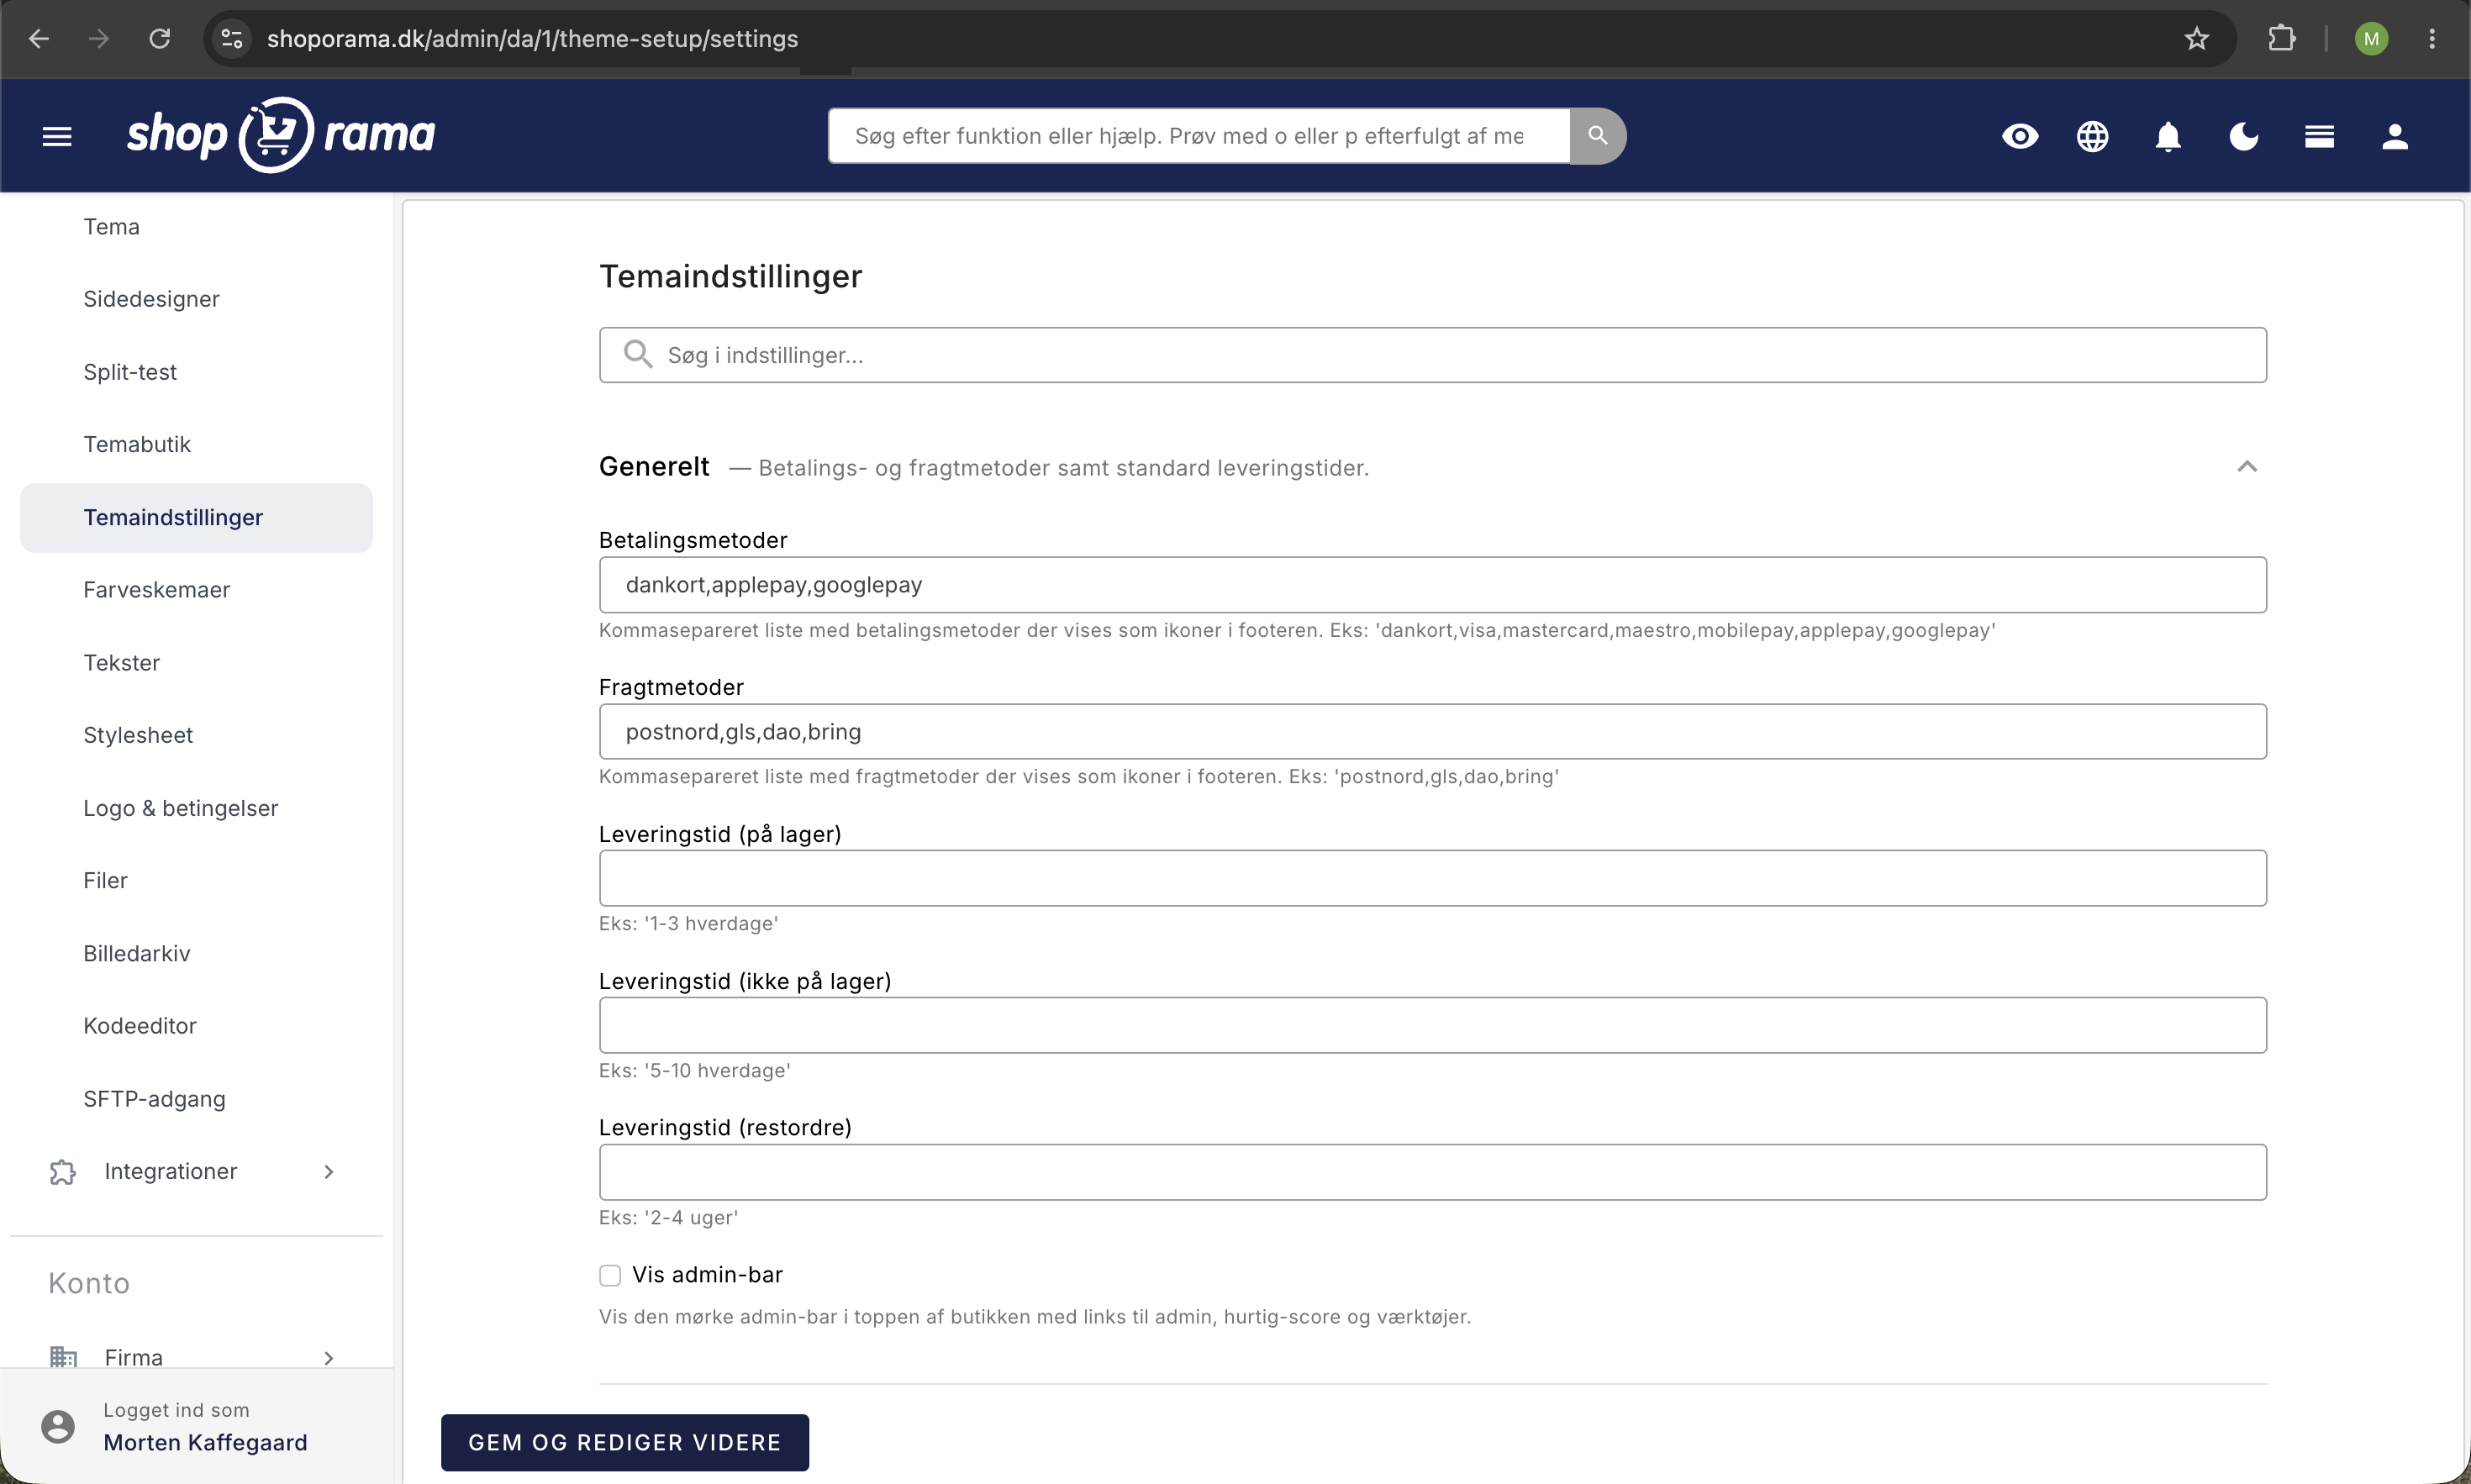
You enter the default shipping times for in-stock items, items in remote warehouses, and out-of-stock items in the Shipping Time fields under General. The Shipping section has fields with nearly identical names, but the theme does not use them. The delivery time can be overridden on an individual product.
Logo, Colors, and Badges
Under “Theme & Colors,” you can:
- Enter the URL for the logo and favicon (upload the file itself under Design → Files, and copy the URL). If you’ve uploaded a logo or favicon under Design → Logo & Terms, the theme will use those instead.
- Select the primary and accent colors as hex codes, e.g., #1a73e8
- Add alt text to the logo (important for accessibility and SEO)
Under Badges, you can customize the colors of the small badges that appear on products, such as On Sale, New, In Stock, and Volume Discount.
Footer Menus
Delaware has space for two menus in the footer, between the column with your company information and the newsletter sign-up form. Here’s how to add them:
- Go to Content → Menus
- Click “Create New Menu,” enter a “Name,” and click “Create.” The name will become the heading for the column in the footer.
- On the menu page, enter footer_menu_1 or footer_menu_2 in the Tag field. You can also click one of the theme’s tags below the fields to insert it. Leave Menu Location set to -- none --. Footer menus are identified by the tag, and a menu with the location set to Top may end up as the main navigation.
- Add the menu items you want to display, and click Save.
Megamenu
A mega menu is a large, multi-column dropdown typically used as the main navigation, allowing customers to quickly navigate a large product selection.
The main navigation in Delaware is the menu where the Menu Location is set to “Top.” You can edit it under Content → Menus. There can only be one menu with the “Top” placement. A megamenu is created from a submenu in the main navigation, where the “Class” field contains “megamenu” and nothing else (not “mega_menu,” and without spaces or other classes). You enter the class in the “Class” field on the submenu’s row, or in “Optional CSS Class” when you create the submenu using “Add Submenu.”
The structure itself requires three levels: the main navigation contains the submenu with the class “megamenu,” and within that, each submenu becomes a column. Regular items located directly under the “megamenu” item are not displayed, so they must be placed inside a column. In each column, the first item becomes the column header, but only if it is a category, a product, or a landing page. If the first item is a link or a static page, it is not displayed at all. The rest of the items in the column become links. If you set the `show_image` class on the first item in a column, and it is a category, a product, or a landing page, the object’s image appears as an eye-catcher at the top of the column. Use `show_image` only on the first item; otherwise, the item will appear twice. Read more in the article about menus and navigation.
Payment and Shipping Icons in the Footer
You don’t need to upload images of payment cards or shipping carriers. Delaware has built-in SVG icons, and you select them from two fields under General. The icons appear in the footer and in the shopping cart.
The Payment Methods field (path: payment_methods) is a comma-separated list, e.g.:
dankort,visa,mastercard,maestro,mobilepay,applepay,googlepay
These names are built-in as icons in Delaware:
- dankort, visa, mastercard, maestro
- mobilepay, applepay, googlepay, paypal
- Klarna, Viabill, Anyday, Bank Transfer, Invoice, EAN
Enter the names in lowercase, without spaces between the commas. A name that isn’t available as a built-in icon won’t cause an error, but a blank field will appear instead of an icon.
The Shipping Methods field (path: shipping_methods) works the same way, e.g.:
gls,postnord,ups,burd
These shipping names are built-in: gls, postnord, dao, bring, ups, dhl, burd, budbee, coolrunner, dkfragt, instabox, swipbox, and pickup.
Tip: If a logo is missing as a built-in icon, please contact support so we can look into adding it to the theme.
Trustpilot Integration
Delaware uses Trustpilot’s official widgets. Each widget requires its own Template ID, which you can copy from Trustpilot’s Business Portal. The fields are located under Integrations:
- Enable Trustpilot
- Enter your Trustpilot Business ID (path: trustpilot_business_id). This is your store’s unique ID on Trustpilot
- Fill in the Template ID for the widgets you actually want to display:
- Trustpilot Template ID Carousel (trustpilot_template_id_carousel): large carousel element at the top of the footer on all pages, at the bottom of the checkout, and in the Trustpilot Page Designer module
- Trustpilot Template ID Micro Star (trustpilot_template_id_micro_star): compact stars at the top of the checkout. It’s also used as a fallback in the header and footer if the fields for the other widgets are empty
- Trustpilot Template ID Micro Review Count (trustpilot_template_id_micro_reviewcount): a small text widget displaying the number of reviews at the bottom of the footer
- Trustpilot Template ID Micro Trustscore (trustpilot_template_id_micro_trustscore): overall score at the top of the header and in the checkout sidebar
- Trustpilot Template ID Product Mini (trustpilot_template_id_product_mini): stars below the product name on the product page
- Trustpilot Template ID Product Reviews (trustpilot_template_id_product_reviews): full list of reviews in the "Reviews" expandable section on the product page
- Trustpilot Template ID Starter (trustpilot_template_id_starter): not used by the theme, so you can leave it blank
The two product widgets find the reviews based on the product’s SKU, so the SKU must match the one Trustpilot uses to identify the product.
Important: A Template ID is not the same as your Business ID. The Template ID is retrieved per widget in Trustpilot’s Business Portal, where you select and customize your TrustBox widgets. Widgets on the product page and in the checkout sidebar are only displayed when their respective fields are filled out. The header and footer always display a widget when Trustpilot is enabled and use Micro Star if their respective fields are empty. Therefore, always fill in the Trustpilot Template ID for Micro Star.
Instagram, Facebook, and Other Social Links
Delaware displays small icons in the footer that link to your social media profiles. You enter the URLs under Company:
- Instagram URL (path: instagram_url)
- Facebook URL (facebook_url)
- YouTube URL (youtube_url)
- Google URL (google_url)
Enter the full URL, e.g., https://www.instagram.com/dinprofil/. If you leave the field blank, the icon will not appear.
Note: The Instagram URL field under “Company” is only a link to your profile. If you want to display your Instagram posts on a page, add the Instagram module in Page Designer. It can display your profile with your latest posts, a Follow button, or both, and in the field for your own embed code, you can instead insert a feed from a third-party solution such as Behold or Elfsight. No Access Token is required. Read more in the article about Facebook and Instagram on your online store.
Value Propositions (USPs)
You can display up to four Value Propositions. These could be “Free shipping on orders over 500 kr.”, “30-day return policy”, or “Fast delivery”. Set them up under “Value Propositions,” where each USP has fields for text, description, icon, and, if applicable, a link. Once you’ve filled them out, they’ll automatically appear in a bar at the top of the page and above the footer. With “Enable Value Propositions” under “Product, ” the first three can also be displayed on the product page, and they can be added as a module in the Page Designer.
In the “Icon” field, enter the name of one of the theme’s built-in icons, such as “truck,” “arrow-return,” “check,” “star,” “heart,” “credit-card,” “storefront,” “lifebuoy,” or “shopping-bag.”
The Homepage and Page Builder
The homepage is built using Page Designer, where you can add sections such as hero banners, product carousels, image galleries, text, and blog feeds. You can drag and drop sections and edit the content without touching the code. The Page Builder can also be used on categories, landing pages, products, and several other page types.
The Category feature module appears in the list of modules, but Delaware cannot display it, and the store displays an error message instead. Use Category List or Category Slider instead.
Product Page Features
Under “Product,” you can enable or disable a wide range of features:
- "Others Have Also Bought," " Similar Products," and " Related Products," each with autocomplete from the same category
- Wishlist, both simple (browser-based) and full (requires login)
- Expandable tabs for product details, shipping, returns, payment, and questions. The tabs for shipping, returns, and payment only appear once you’ve entered text under “Terms of Service” in the theme settings. Delaware does not use the “Terms and Conditions” field under Design → Logo & Terms. If you’ve entered your terms there—for example, because you’re switching from another theme—you’ll need to copy them over to “Terms of Service.” Otherwise, the terms field will be empty at checkout
- "In Stock" badge, backorder message, and campaign message
- Image gallery with thumbnails and lightbox
- Care instructions and size guide, displayed as expandable fields and retrieving content from a static page via a product label. See the guide for the size guide. The care instructions work the same way, but with a tag containing “washing-instruction”
- Omnibus Price: Displays the lowest price over the last 30 days for sale items. This requires Price Logging to be enabled under Statistics → Price History
Custom tabs, video, and subtitle on the product
You can split a long product description into multiple expandable tabs directly in the Description field on the product page. A tab begins with a line containing the code [tab type="care" title="Care"] and ends with a line containing [/tab], for example:
Our popular sweatshirt made of soft cotton.
[tab type="materials" title="Materials"]
80% cotton and 20% polyester.
[/tab]
[tab type="care" title="Care"]
Wash at 40 degrees.
[/tab]
- Each code must be on its own line, so press Enter before and after the code.
- There must be text before the first tab. It appears under "Description " (in Delaware), and text after the last tab appears under "More information " (in Delaware).
- "type" and "title" may only contain the letters a-z and A-Z, numbers, spaces, and underscores. Æ, ø, å, and hyphens do not work, and the codes will then be displayed as plain text.
To add a video to a product page, enter the video’s YouTube ID in the “YouTube ID” field in the “Theme Settings” section of the product. A play button will then appear on the product image. In text fields such as category descriptions, static pages, blog posts, the Page Builder’s text modules, and product descriptions without tabs, you can embed a YouTube video using the code [youtube_embed id="VIDEO-ID"].
To add a subtitle below the product name, enter subtitle=Your text in the Extra Fields field in the Fields section of the product. You can specify add-on products—which customers can add to their cart along with the main product—using product IDs in Addon Settings under Theme Settings on the product page.
Checkout Customizations
The sections Checkout: General, Checkout: Cart, Checkout: Address, Checkout: Approve, Checkout: Thank You, and Checkout: Upsell control each phase of the checkout process. Here, you can, among other things, enable and disable login, discount codes, newsletter sign-up, and upsells, as well as choose whether you’re targeting consumers (B2C), businesses (B2B), and/or government customers (B2G/EAN).
Site Notice (top banner)
Do you want to announce a promotion, a holiday closure, or a general message? Check the “Enable Site Notice ” box in the “Site Notice” section, and enter text—including an “Close” button if desired. You can display different text on desktop and mobile, choose colors, and select how many days the banner should remain closed after the customer clicks it away (the default is 7 days).
Other Integrations
Under “Integrations,” in addition to Trustpilot, you can also enable:
- PriceRunner by entering your account ID. A PriceRunner badge will then appear on the product image based on the product’s SKU
- E-mærket by entering the URL to your E-mærket page, so the E-mærket icon links to it. You can also display E-mærket widgets in the header, on the product page, and in the footer by filling in the fields with the widget ID. Also fill in the E-mærket Widget Script ID, unless the E-mærket script is already located under Webshop → HTML Fields; otherwise, the widgets will remain empty
- Viabill for installment payments (requires a Viabill shop ID)
- AnyDay for installment payments (requires an AnyDay price token)
- Clerk.io for smart search and product recommendations (requires an API key)
Customizations (Custom CSS and JS)
It’s best to place your own CSS under Design → Stylesheet. This is a plain code field, and Delaware loads it after the theme’s own CSS, allowing you to override the theme’s styles. This is the easiest way to make small design adjustments without modifying the theme’s files themselves.
The Custom Code (Beta) section also has fields for CSS and JavaScript, but they work differently than their names suggest. The CSS in the Custom CSS field is always included on every page as soon as anything is entered in the field, regardless of the Enable Custom CSS checkbox. To disable it, clear the field. Delaware does not use the Custom JavaScript field at all. Instead, place scripts—such as those from external services—under Webshop → HTML Fields with the placement “Insert at the end of <head> ” or “Insert at the end of <body>,” or in the Page Designer module’s “Custom Code” field if you only want it on one page. Learn more about HTML fields.
Frequently Asked Questions
Which version of Smarty does Delaware run on?
Delaware and DelawareDK run on Smarty 4, which is the latest version of Smarty supported by Shoporama. If you customize templates yourself, you can therefore use Smarty 4 syntax such as <{$foo = 123}> and <{foreach $items as $item}>.
What is the difference between Delaware and DelawareDK?
The features are the same. The difference is the language, both in the store and in the admin panel: Delaware uses standard English text in the store (e.g., “Size guide” and “Description”) and predominantly English names for theme settings (e.g., “Company” and “Integrations”), while DelawareDK uses Danish text and names. You can edit and translate the store’s texts under Design → Texts in both themes. Learn more about translating and customizing texts.
My payment icons aren’t showing up in the footer. What went wrong?
Most often, a name is spelled differently than in the list of built-in icons above. Enter the names in lowercase, separated by commas, and without spaces.
Which Trustpilot fields should I fill out?
Start with the Trustpilot Business ID and the Trustpilot Template ID “Micro Star.” That way, you’ll have stars in both the header and footer. The other fields are only necessary if you want to display additional widgets.
Can I display my latest Instagram photos directly on the front page?
Yes. Add the Instagram module to the homepage in the Page Builder and enter your profile URL. If you leave the field blank, the module will use the Instagram URL from your theme settings. Your Instagram profile must be public. If you’d rather use a third-party solution, such as Behold or Elfsight, you can insert its code into the module’s field for custom embed code.
Where do I add footer text with the company address and business registration number?
Company name, address, city, ZIP code, business registration number, phone number, and email address are entered under “Company” in the theme settings. This information is automatically displayed in the footer and is also used for structured data (Schema.org), so Google can better understand your store.
Does Delaware use the Theme Builder?
No. Delaware uses Page Designer for page content and Design → Theme Settings for colors, the footer, integrations, and the other settings in this guide. The old Theme Builder is only available for older themes, and the menu item does not appear when you use Delaware.
How well does Delaware work on mobile?
Delaware is built with Tailwind CSS and is fully responsive. The menu—including the mega menu—opens as a mobile menu that slides in from the side, and images are automatically scaled to fit the screen size. You can also choose separate text for the Site Notice on mobile and turn breadcrumbs on or off on mobile.
Can I use the mega menu and the regular menu at the same time?
Yes. You can even mix them within the same main navigation. Only the submenus with the “megamenu” class will expand as a large megamenu. Submenus without that class will appear as a standard dropdown, and regular items will appear as links. And you can still have separate menus for the top and the two footer columns.
Should I choose Delaware or DelawareDK?
Choose DelawareDK if your store is in Danish. That way, the store’s text and the names in the theme settings will be in Danish from the start. Choose Delaware if you prefer standard English texts, such as for an international store. If you switch between them later, your theme settings will be preserved. However, you’ll need to review any texts you’ve edited under Design → Texts, because the two themes have different default texts.
Need help with Delaware? Email us at support@shoporama.dk.
Related articles
Page designer
Lær hvordan du bruger Sidedesigner i Shoporama til at opbygge sidelayouts med blokke som hero-sektioner, produktlister, bannere og meget mere, helt...
Setting up the front page
Lær hvordan du sætter forsiden op i din Shoporama-webshop. Forsiden er en kategori, som du kan tilpasse med Sidedesigner i understøttede temaer.
Variables in a Shoporama theme
Overview of global and page-specific Smarty variables available in Shoporama themes.
Own stylesheet (Custom CSS)
Add custom CSS to your Shoporama online store and admin backend. Customize colors, fonts, layout and hide elements without changing theme files.
What themes are there on Shoporama?
Complete overview of all free themes on Shoporama: Delaware, DelawareDK, California, Alaska 2, Washington, Montana, and the classic Smarty 2 themes...
Implement Theme Builder in your theme
Guide to implementing Shoporama's Theme Builder in your theme so the merchant can build pages visually.
Menus and navigation
Learn how to create and edit menus in your online store. This guide covers menu item types, hierarchy, placements, drag-and-drop sorting, and how...
Show Facebook and Instagram on your online store
Sådan laver du en størrelsesguide i Delaware-temaet
Step-by-step guide to setting up a size guide in the Delaware theme on Shoporama. Enable the theme setting, create a static page and a product...
Translate and customize texts in your webshop
Customize all text in your online store's theme—from buttons to checkout and emails—under Design → Text, and see how it aligns with the...
HTML fields: Insert Cookiebot, GTM and other scripts in your online store
How to use Shoporama HTML fields to insert Cookiebot, Google Tag Manager, Facebook Pixel, chat widgets and other custom HTML/JavaScript on your...
Logo, Favicon, and Terms and Conditions
Here's how to upload your logo and favicon and enter your terms and conditions in Shoporama. See where the content appears in the store, at...
Related features
Full design freedom - your design, your rules
Design your online store freely with full access to HTML, CSS and templates. Use templates, Page Builder or build from scratch.
Point of Sale, Email, and Integrations in Delaware
All fields in Delaware's theme settings for the checkout, emails, terms of service, integrations, and error pages explained with tags, examples,...
Delaware and DelawareDK: All modules in the page designer
A guide to all 25 modules in the page builder for Delaware and DelawareDK: hero, products, categories, text, content items, and...