Scan the items on the picking list
Pick orders using a standard barcode scanner. You scan the item, and the system automatically finds the order that needs it, counts the quantity, and can complete the order automatically.
You can pick orders using a standard barcode scanner instead of clicking through the picking list. You pick up an item, scan it, and the system automatically finds the order that’s missing that specific item and checks it off. You’ll hear a beep as confirmation, and devices that support it will vibrate, so you can keep your eyes on the item instead of the screen.
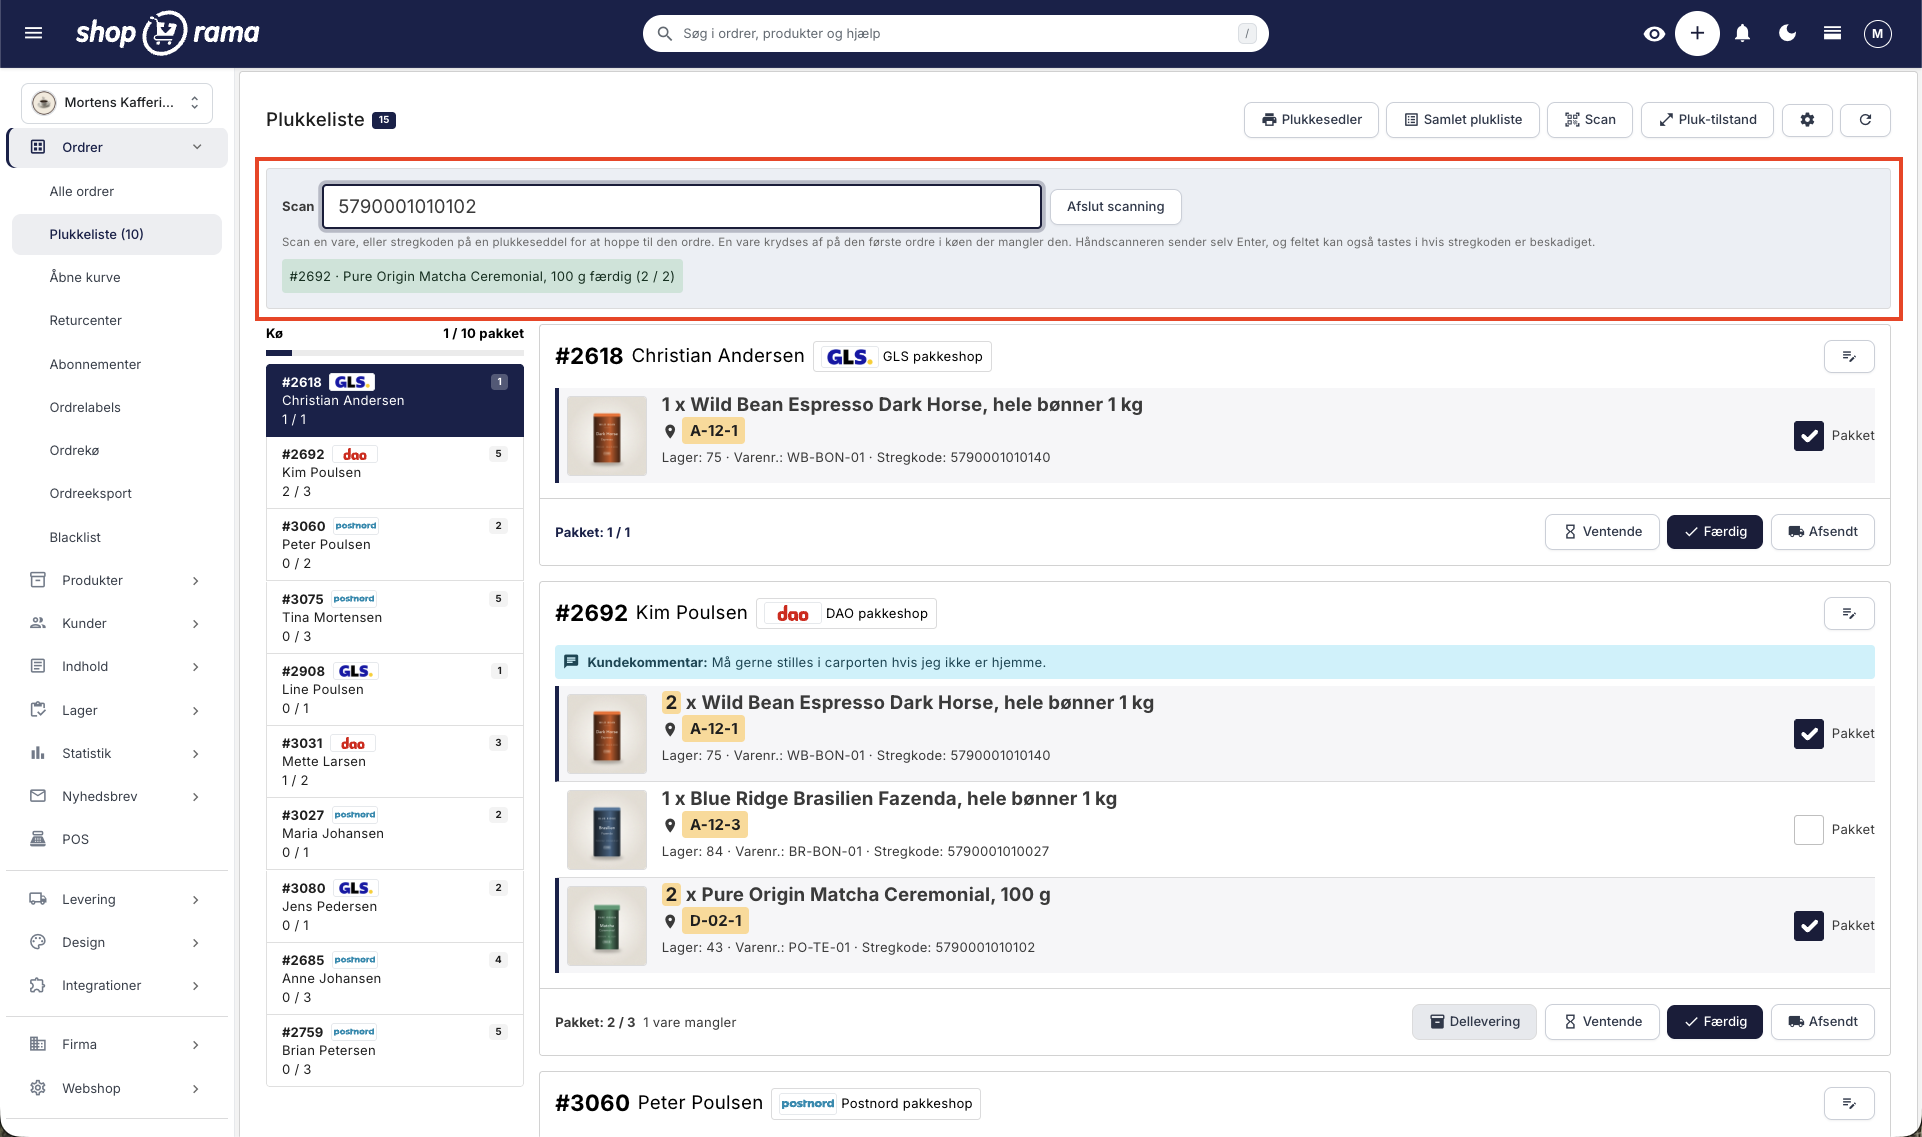
How to Get Started
- Connect your scanner to your computer or tablet. Most handheld scanners act like a keyboard and work without any setup
- Open Orders → Picking List
- Tap Scan at the top. A field will appear with the cursor ready
- Scan the item. If it’s on one of the orders, it will be marked off immediately
You don’t need to select an order first. Scanning applies to the entire page: the system searches among the orders on the page you’re on and finds the one that’s missing the item. If multiple orders are missing the same item, it goes to the top one—that is, the customer who has been waiting the longest.
Note that only the ten orders on the current page can be processed. If you need to go through the entire queue, go through one page at a time. The order number is the exception: if you scan the barcode on a picking slip, it is matched against the entire queue.
If two units of the same item are needed, scan twice. The counter next to the item displays 1 / 2 until you’ve scanned enough, and only then is the checkmark added.
The scanning mode is saved on each individual computer or tablet. If there’s a fixed packing station with a scanner, you don’t need to turn it on again every time you move to the next page in the queue. You turn it off again by selecting “End Scanning.”
Items must have a barcode or an item number
The system recognizes a scan by comparing it to the product’s GTIN (barcode, typically EAN-13) or item number (SKU). Both fields are listed on the product under Inventory Management. If the product has variants, the variant’s own numbers are used, and there is no fallback to the product’s: if the variant’s GTIN and SKU are empty, the line cannot be scanned at all, even if the product has a barcode. Therefore, be sure to fill in the fields in the variant table and not just on the product itself.
If an item has neither a GTIN nor an SKU, it cannot be scanned. You can still check it off with the mouse so that picking doesn’t come to a standstill, but it’s worth spending an evening adding barcodes to the items you ship most frequently. You can enter them for each product under Inventory Management or update many at once via a CSV import.
The field can also be filled in manually
If the barcode is crumpled, wet, or torn, you can type the numbers directly into the field and press Enter. It works exactly the same way as a scan.
Scan the picking slip to jump to an order
The barcode at the top of a printed picking slip is the order number. If you scan it, the page jumps to that order, even if it’s on a different page in the queue. It’s faster than flipping through pages, and you don’t have to put the scanner down.
In practice, this creates a very simple workflow at the packing table: take the top slip from the stack, scan it, scan the items, close the box, and take the next slip.
What the system tells you
A message appears below the scan area after each scan, and devices that support it emit a short beep and a vibration. A high-pitched tone means everything went well; a low-pitched tone means something is wrong.
- Green · The item is marked off, showing the order number and how far along the line is (e.g., 1/2 scanned)
- Yellow · The item exists but has already been scanned for all the orders that were missing it. You’ve either scanned it once too many times or picked up an item that shouldn’t be included
- Red · The code does not match any item on the page. If the code is a number, the system also tries to look it up as an order number throughout the entire queue before reporting an error
If you scan an order number for an order that isn’t in the queue, the system will tell you directly instead of just reporting an unknown code. That way, you’ll know that the order has either already been packed, hasn’t been paid for, or is waiting for a backordered item.
Automatically complete the order once it has been fully scanned
Under the gear icon at the top, you can choose what should happen when the last item on an order is scanned.
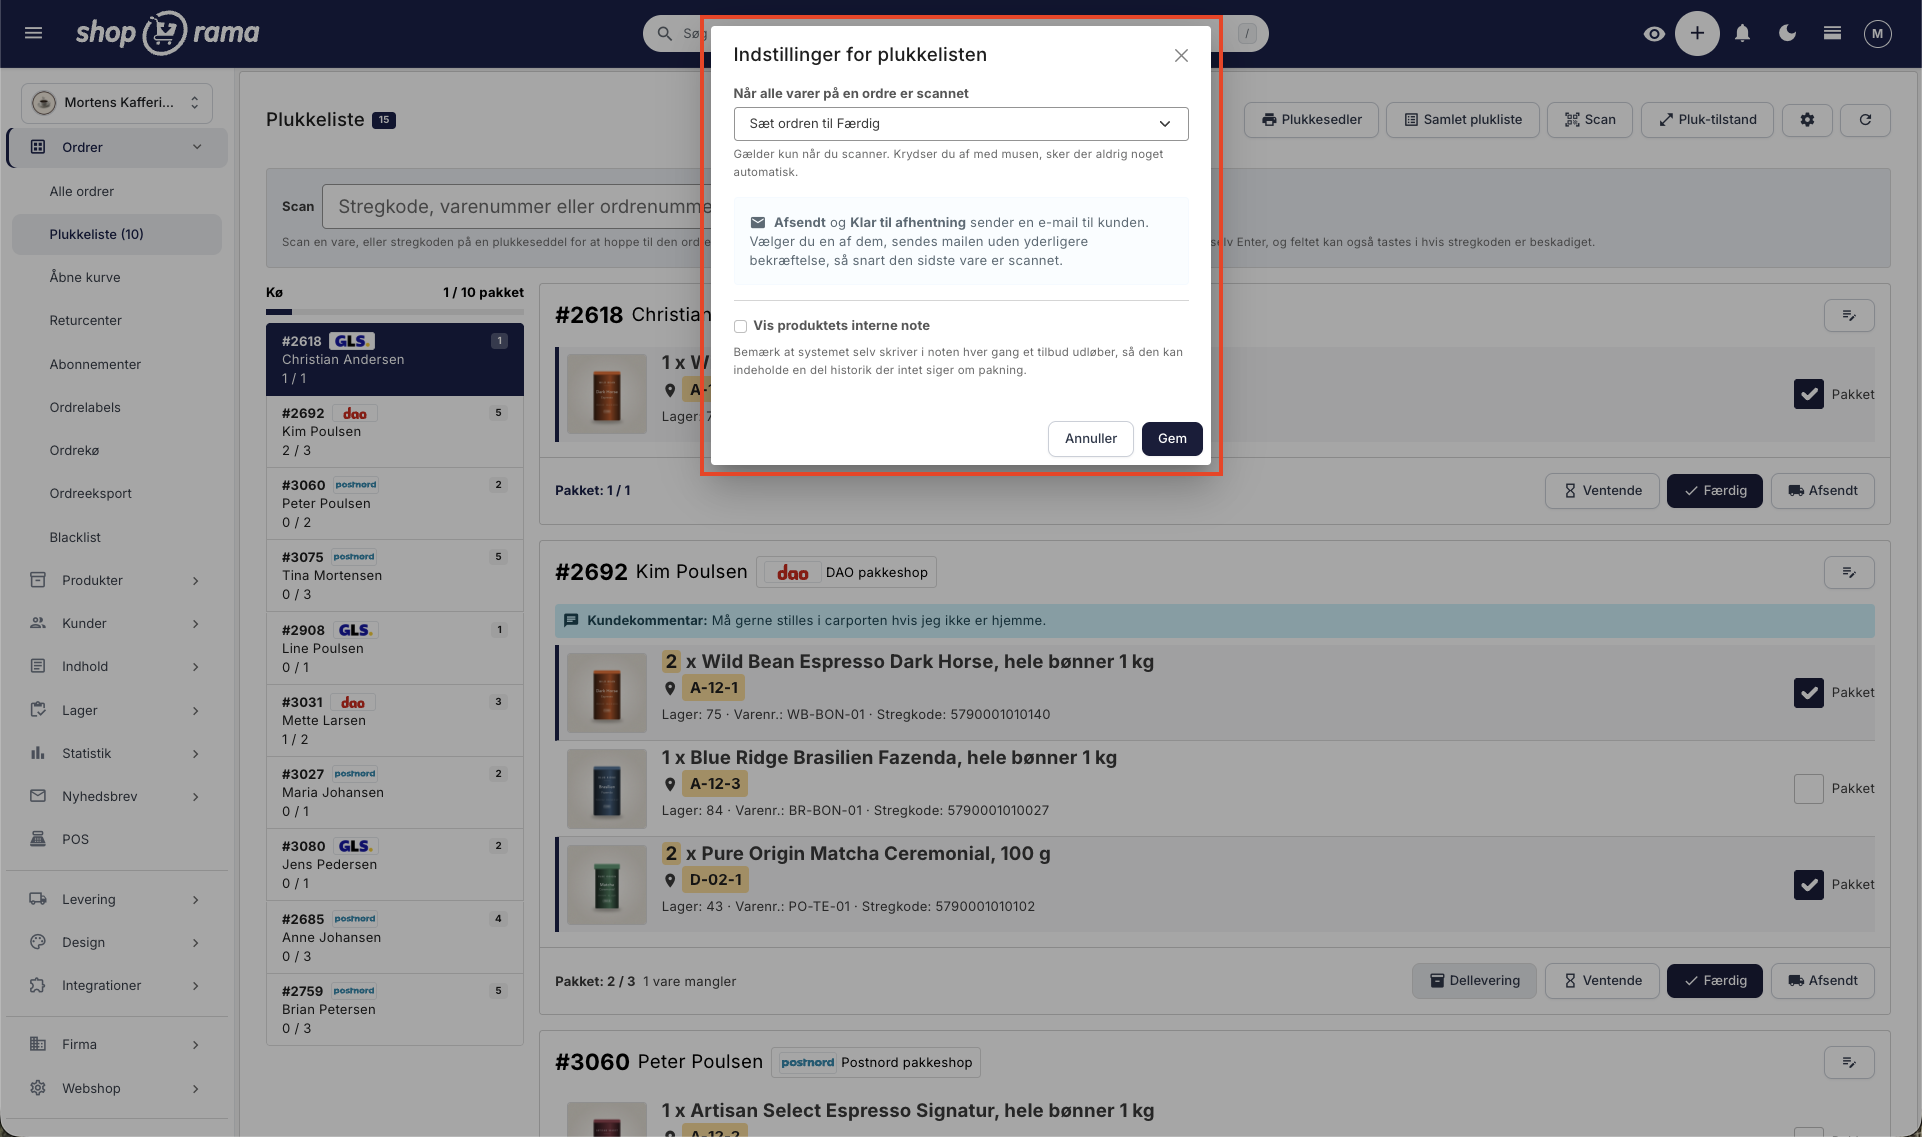
- Do nothing · default. You press the button yourself
- Set the order to “Complete” · the order leaves the picking list and awaits shipment. The customer receives no notification
- Set the order to Ready for Pickup · for stores where customers pick up their orders themselves. The customer receives an email that the package is ready
- Set the order to Shipped · the customer receives the standard notification that the package is on its way
The last two options send an email without asking
If you select “Shipped” or “Ready for Pickup,” the email is sent the moment the last item is scanned. That’s the whole idea, but it’s worth agreeing on this with the warehouse team before you enable it.
The same scanner is also used for inventory receipt
If you have a scanner on hand, it can be used at both ends of the workflow. With “Quick Inventory Receipt,” you scan the items in when the shipment arrives, and on the picking list, you scan them out again when they’re ready to go. It’s the same hardware and the same barcode.
The mouse still works
Scanning doesn’t replace the checkmarks on the picking list—it’s a shortcut to them. You can click “Packed” with the mouse at any time, even in the middle of a scan, and you can mix the two methods on the same order. This is necessary because there are always items without barcodes, and a scanner that runs out of power shouldn’t stop the packing process.
Frequently Asked Questions
Which scanner should I buy?
Any standard USB or Bluetooth handheld scanner will work. They act like a keyboard and automatically send a line break after the code, and that’s all it takes. You don’t need a driver, an app, or a specific model. If you already have a scanner for the checkout or for inventory, you can use that.
Can I use my phone’s camera instead?
Not directly in the picking list. The field accepts text, so an app that can read barcodes and enter them as keystrokes will work, but this isn’t something we officially support. An inexpensive handheld scanner is both faster and more reliable in a warehouse.
What if I scan the wrong item?
If the item belongs to another order in the queue, it will be checked off there, and a message will indicate which order it was. If it doesn’t belong to any of the orders at all, you’ll see a red message and nothing will happen. If you’ve scanned an item once too many, you can uncheck the box again with your mouse.
Do I have to scan in a specific order?
No. You can go through the warehouse shelf by shelf and scan whatever you come across, and the system will automatically assign the items to the orders. That’s exactly why the combined picking list makes sense: you pick by shelf and let the scanner keep track of who gets what. Just remember that the scanner only captures the orders listed on the page you’re currently viewing.
Does it work if two of us scan at the same time?
Yes. The checkmarks are shared across the entire store, so you’re both working from the same list. However, the page doesn’t update automatically, so use the refresh button to see what the other person has scanned. Orders aren’t locked to a single person, so it’s best to split the queue between you—for example, by having one person take the top orders and the other the bottom ones.
My items don’t have barcodes. Does that mean the feature is useless?
No, but you’ll get the most out of it if at least your best-selling items have one. You can use the supplier’s EAN number if the item has one; otherwise, you can use the item number: if you attach your own barcode labels with the item number, the scanning works exactly the same way.
Are the scans saved?
Completed lines are saved in your store and survive both page reloads and device changes. If you’re in the middle of a line—for example, 1 of 2 scanned—the counter only exists in the browser and is reset upon a page reload. The checkmarks are automatically cleared when the order leaves the “In Progress” status, so they cannot be used as documentation afterward. The scan mode itself—that is, whether the field is open—is stored locally in the browser on each individual device.
Related articles
Pick list
How to use the picking list in Shoporama: the queue, shelf location for each item, scanning with a barcode scanner, printing picking slips, and the...
Print the picking slip and the consolidated picking list
The two printed documents from the picking list: one picking slip per order with a barcode, and a consolidated picking list where the items from...
Quick Inventory Entry: Add Items to Inventory Using a Barcode Scanner
Scan a barcode or an item number, enter the quantity, and the items are in stock. Here's how to use Shoporama's quick inventory entry feature for...
Warehouse Placement: Assign a shelf location to your items
The "Warehouse Location" field indicates where the item is physically located. The picking list and both print documents are sorted by this field,...
Related features
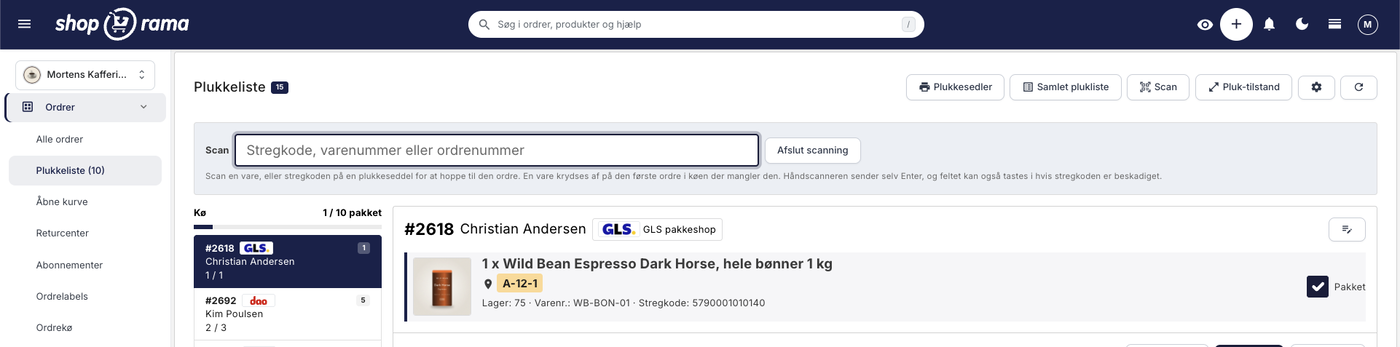
The picking list has been redesigned: scan the items, print the picking slip
The picking list can now scan items, print picking slips and a consolidated picking list, and it remembers what you've checked off. The orders are...
Pick list
Print picking lists directly from Shoporama. Streamline your warehouse work with an overview of orders, products and batch numbers in one clear view.