Emergency situation

In case of emergencies or breakdowns, you can send an SMS to our emergency hotline

On-call phone (SMS only)

+45 29 70 15 95

Send an SMS with the following information:

  • Your name and webshop
  • Description of the problem
  • Your callback phone number

Notes: This service is only for critical situations where your webshop is down or has serious problems. For regular support, please use our normal support channels.

Product overviews

Shoporama product overview guide: Search, filter, sort and mass edit your products efficiently from the product list.

Reading time: approx. {eight} minutes
Shopejer

The product overview is your daily tool for managing all the products in your online store. From here, you can search, filter, sort, and bulk edit products—all from a single view. You’ll find the product overview under “Products,” “All Products” in the menu.

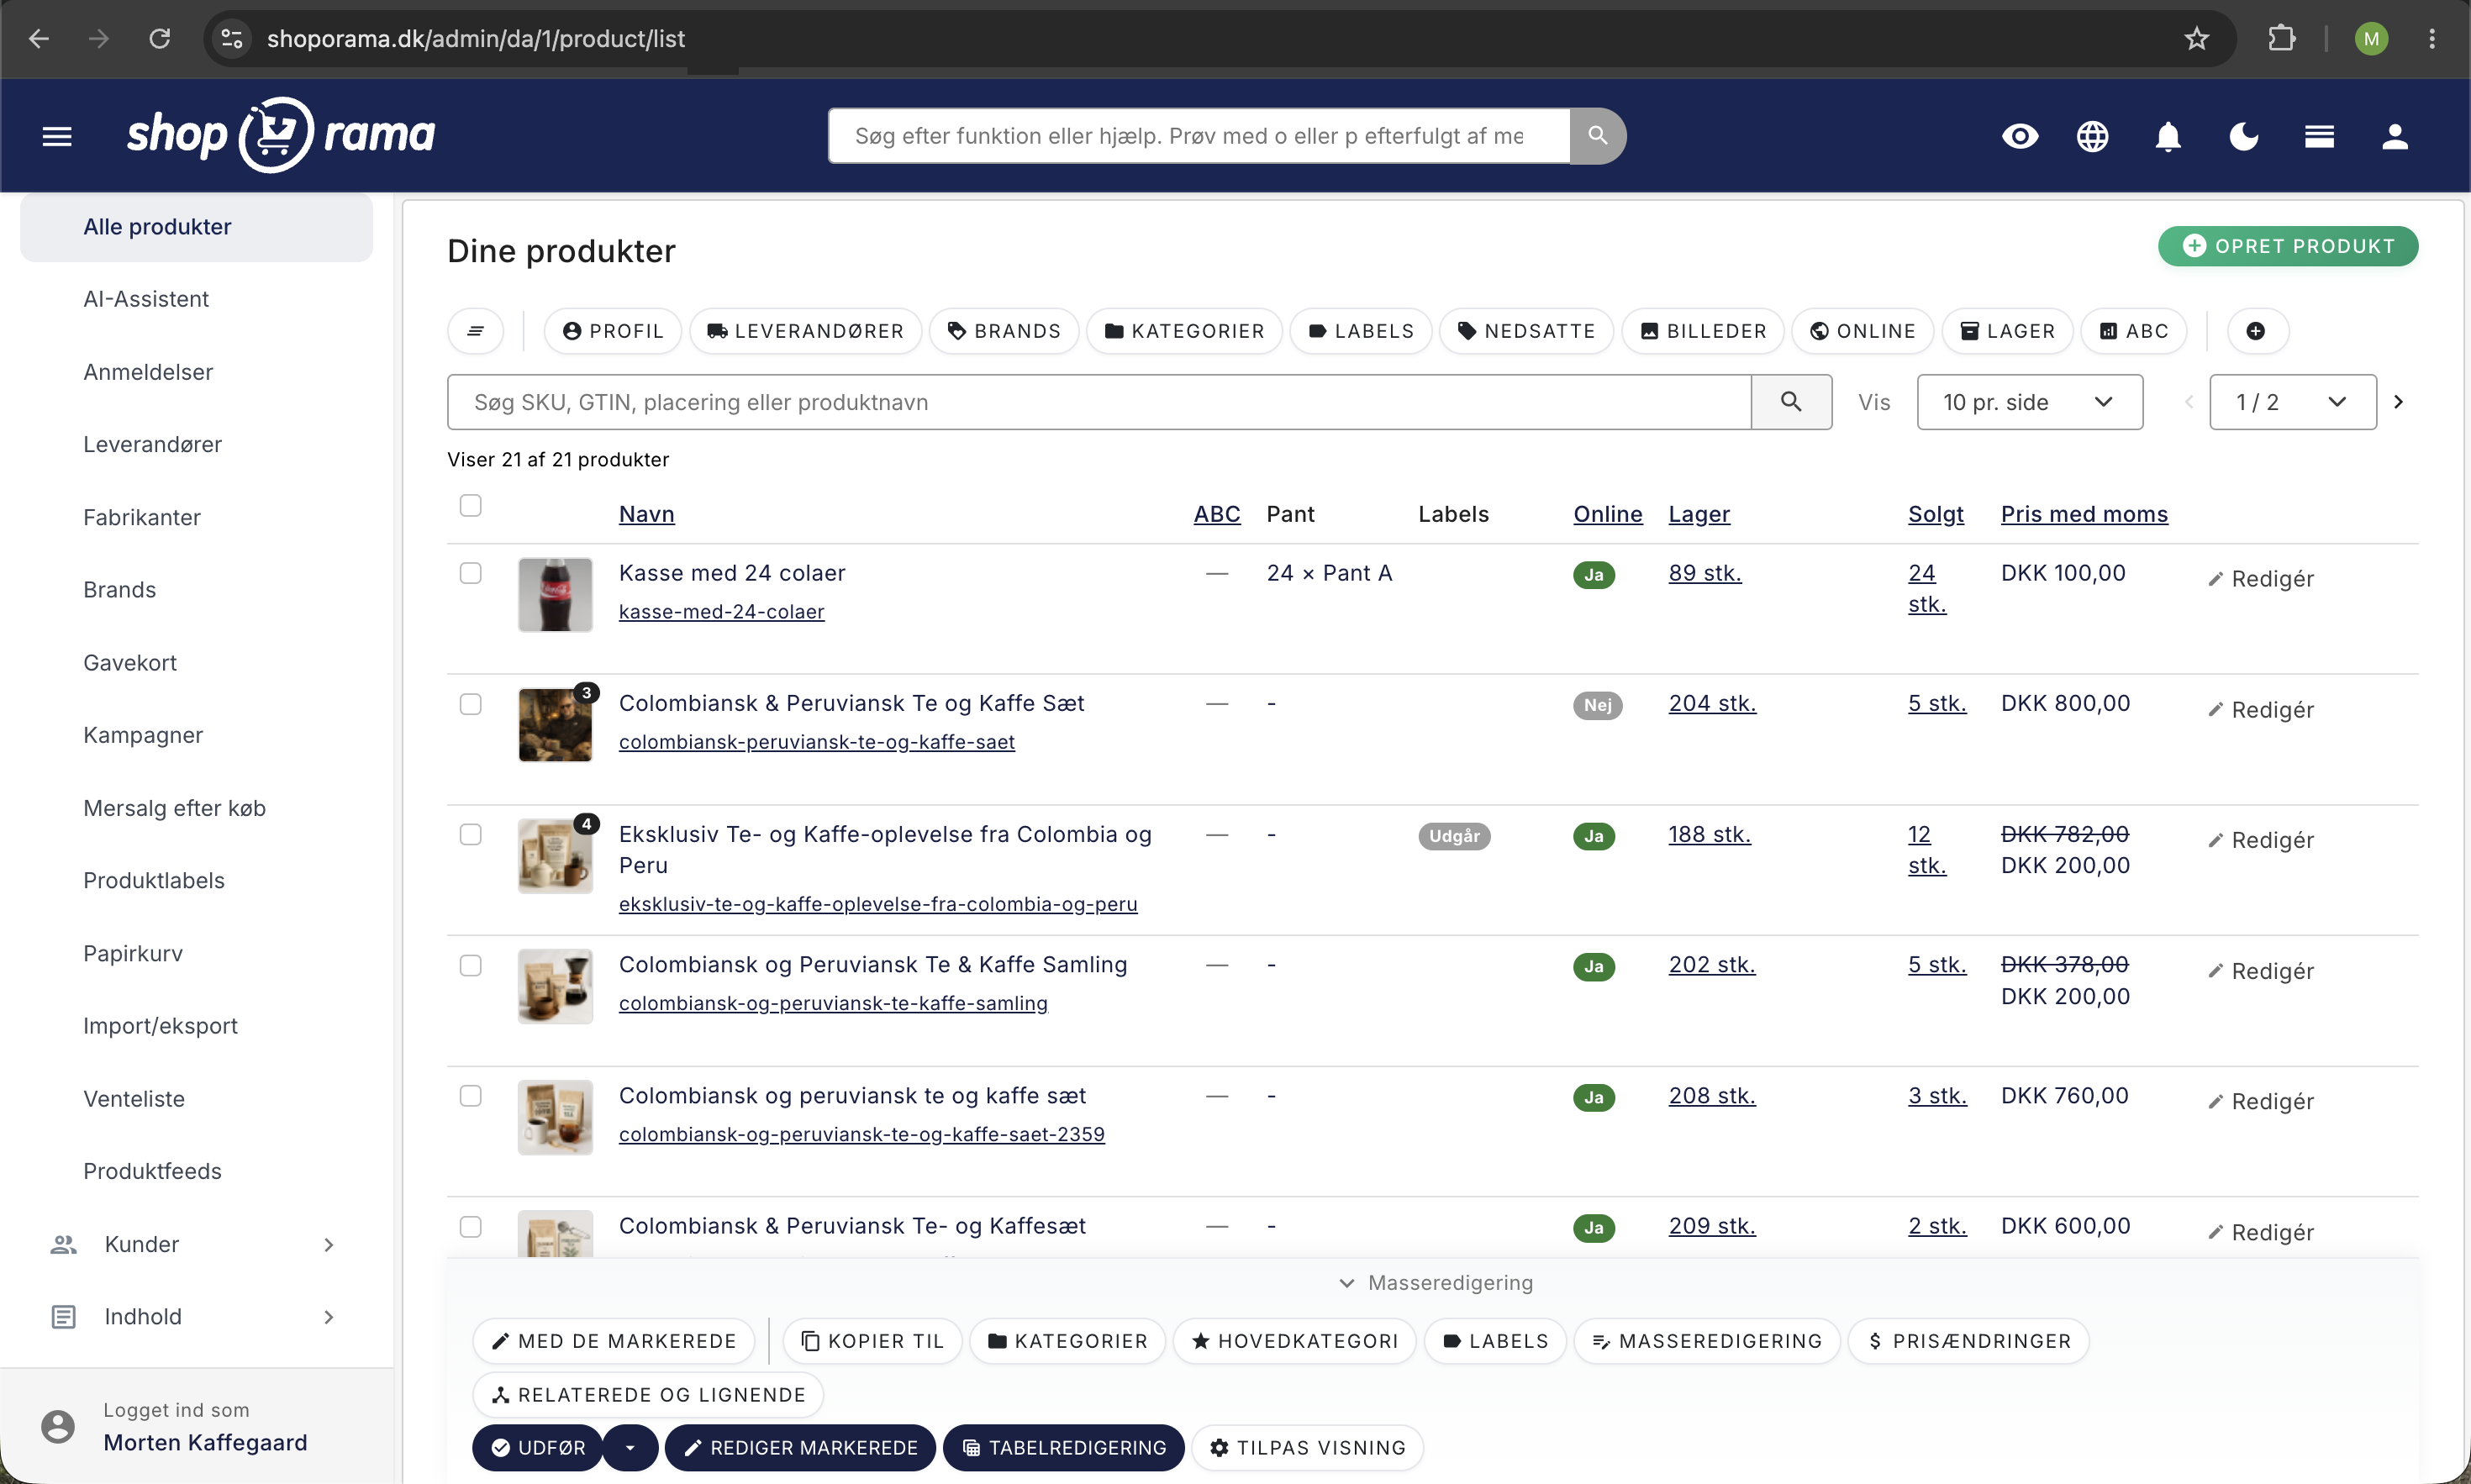
Produktoversigten i Shoporama-admin med filterknapper, produktliste med online-status, lager, solgt, og pris samt masseredigeringsbaren nederst
The product overview displays all products with filter buttons and a search field at the top, columns for online status, inventory, sold, and price in the middle, and the bulk edit bar at the bottom.

Search

At the top of the page, you’ll find a search field where you can search by product name, SKU (stock keeping unit), GTIN, and warehouse location. The search runs immediately when you press Enter or apply a filter.

Actions at the top of the page

In the top-right corner is “Create Product,” which opens the form for a new product. Just below the header is the toolbar that follows you as you scroll down the list, allowing you to search, filter, or switch pages without scrolling back up. It includes:

  • The Reset icon on the far left of the filter row, which removes all filters and search terms at once.
  • The filter buttons, and to the right of them, your saved shortcuts as well as the plus button, which saves the current view as a new shortcut.
  • The search bar, which searches the entire product range and not just the page you’re on.
  • The view selector, which lets you choose the number of products per page, and the page navigation with arrows and a drop-down list showing, for example, 3 / 12, so you can jump directly to a specific page.

Just above the first row of products, it says “Showing X of Y products.” Y is the total number of products that match your filters and search term, and X is the number of products on the page you’re viewing. If the two numbers are the same, you’re looking at the entire result set.

The search field finds more than just the name and SKU. It also matches MPN, product ID, the product’s web address, and the words you’ve entered yourself in the internal search. If the product has variants, Shoporama also searches the variant’s SKU, GTIN, and stock location. If you enter a complete SKU number or a barcode, you’ll therefore see only that one product.

On small screens, the filter buttons, shortcuts, and page selector at the top are hidden to make room for the list. The search field remains visible, and both the page selector and the number of items per page are located at the bottom of the page.

Filtering

Above the search field, you’ll find a series of filter buttons that let you narrow down the product list exactly to what you need. You can combine multiple filters at once:

  • Profile — Filter by product profile (e.g., “Clothing,” “Electronics,” or other profiles you’ve created)
  • Suppliers — Show only products from one or more specific suppliers
  • Brands — Filter by one or more brands
  • Categories — Show products from specific categories
  • Labels — Filter by the labels you’ve assigned to your products
  • On Sale — Show only products with a sale price, or only products without a sale price
  • Images — Show only products with images, or only products missing images
  • Online — Show only products that are online, or only products that are offline
  • Inventory — Filter by inventory status: in stock only or out of stock only
  • ABC — Filter by ABC analysis (A = top 80% revenue, B = 80–95%, C = bottom 5%)

Each filter button displays a number indicating how many active filters are applied. Click the button again to change or remove the filter. You can reset all filters using the reset button on the far left.

How the filter panel works

When you click a filter button, a small window opens. The window does not change the list itself. Only when you click the blue “Apply Filter” button will the list be reloaded with your selection. If you click “Cancel” or close the window using the X, nothing happens to the list.

The filters fall into two types:

  • Select multiple: Suppliers, Brands, Categories, and Labels have checkboxes, so you can select multiple options at once. A product is included if it matches at least one of your selections.
  • Select one: Profile, On Sale, Images, Online, In Stock, and ABC have round radio buttons, where the “All” option turns the filter off again.

In the windows for suppliers, brands, and categories, there’s a search bar so you can quickly find what you’re looking for without scrolling. If your store has more than 1,000 categories, the category window automatically switches to search mode: type at least one letter to see results, and the categories you select are grouped as small labels at the top of the window, where you can click them away again.

The filters work together. If you select both a supplier and a stock status, you’ll only see the products that meet both criteria. Your selections appear in the browser’s address bar, so you can bookmark a specific view or send the link to a colleague who has access to the store.

Two of the filters offer more options than you might think:

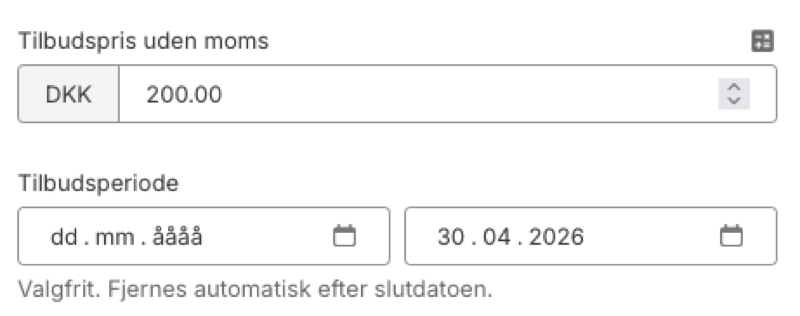
  • In addition to “Only on sale” and “Only not on sale,”the “On sale” filter also includes “Only scheduled offers,” which shows offers set to start on a future date, and “Offers expiring soon,” which shows offers ending within seven days.
  • ABC has a fourth option, “No ABC Data,” which finds products that haven’t sold enough to be classified. The classification is based on sales from the last 90 days, and from this window, you can jump directly to the full ABC analysis under “Statistics.” Read more in the article “ABC Analysis.”

Saved Filters (Shortcuts)

If you frequently use the same combination of filters, you can save it as a shortcut. Click the + button in the filter bar to create a shortcut with the current filters. The shortcuts appear as buttons, allowing you to quickly switch between different views.

Rename or delete a shortcut

Shortcuts belong to the online store itself and not to your individual user account. If you create a shortcut, everyone working in the store can use it, which is why shortcuts are ideal for recurring workflows such as “Out of stock at supplier X” or “Missing images.”

Next to each shortcut is a small pencil icon. Click it to open “Edit View,” where you can rename the shortcut and click “Save,” or remove it entirely by clicking “Delete.” The shortcut you’re currently on is highlighted in the filter row, so you can see which view you’re looking at.

A shortcut saves what’s in the address bar when you create it—that is, your filters, your search term, and the sort order you’ve chosen. Empty fields aren’t included, so the shortcut contains only the filters you actually set. You can rename a shortcut, but you cannot change its filters. If you need to change the content, set up the filters again, save a new shortcut, and delete the old one.

Sorting

Click a column header to sort the product list. Click again to toggle between ascending and descending order. You can sort by:

  • Name, SKU, GTIN, MPN
  • Profile, Brand, Supplier, Main Category
  • Online Status, Inventory, Units Sold, Price
  • Creation Date, Product ID, Location, ABC Class

Customize Columns

You can choose which columns are displayed in the product overview. Click " Customize View " in the bulk edit bar to select or deselect columns. This setting applies to all users of the online store.

Columns available in addition to the standard columns (name, online, stock, sold, price) are:

  • Product ID, SKU, GTIN, MPN
  • Profile, Brand, Supplier, Main Category
  • Location, Creation Date, Internal Note
  • Number of Returns, Number on Wish Lists
  • Subscription Price, Subscription Interval, Commitment Period
  • Purchase Price, ABC Class
  • Deposit & Security Deposit (shows deposit type and quantity, e.g., "24 × Deposit A"—the column links directly to the product’s Legal tab)

How to Get the Most Out of the Column Selector

In addition to the columns above, you can enable “Promotion Period” and “Unit Price,” and if you have customer groups in your store, you’ll also get a price column for each customer group, so you can see the group’s actual price without opening the product page.

"Offer Period" is the column worth knowing if you’re running offers. It shows whether an offer is set to start on a future date, how many days are left until it ends, and clearly highlights when an offer ends within three days or has already expired. This way, you’ll spot promotions that would otherwise continue or end without anyone noticing.

Here are three things to know about the columns:

  • Most columns can be sorted. For example, if you enable “Purchase Price,” “Creation Date,” or “Offer Period,” you can click on the header to sort the list by that column. “Internal Note,” “Deposit,” “Unit Price,” “Customer Group Prices,” and “Labels” cannot be sorted.
  • The cells are links. If you click in a column, the product opens directly on the tab associated with that field—for example, clicking in the “Brand” column takes you to the “Brand” tab.
  • The Returns column has a “Show Reasons” link listing the reasons customers have provided, and the Wish List column links to the wish lists where the product is listed.

If you select many columns at once, the table will be wider than the screen, and you’ll need to scroll horizontally to see everything. It’s better to choose the five or six columns you use in your daily workflow and agree on the selection with your colleagues, since this applies to the entire store.

Number of Products per Page

You can choose how many products are displayed per page: 10, 25, 50, 100, or 250. This setting is saved between visits. Use the page selector at the bottom to navigate between pages.

Bulk Editing

At the bottom of the page, you’ll find the bulk edit bar. Select products using the checkbox next to each one (or use Cmd/Ctrl + A to select all), and then use the various bulk edit tools.

The bar at the bottom: selection and memory

The bar remains fixed at the bottom of the screen as you scroll. If you click the word “Bulk Edit” or the arrow next to it, you’ll collapse the bar so you have the entire screen for the list. Shoporama remembers your selection for the next time you open the product overview.

Next to the text, it continuously displays how many products you’ve selected, e.g., “(12 selected).” You can select items in three ways: the checkbox next to each product, the checkbox in the top row of the table, or "Select All " in the bottom-left corner next to the page selector. The two "Select All" checkboxes work together.

Please note that the selection applies only to the products displayed on the page you’re currently viewing. If your filter has found 400 products and you’re viewing 100 per page, the bulk edit will only apply to those 100. If you switch pages, the selection will disappear, so perform the action before scrolling further.

The bar does not appear on small phone screens, and if you’re logged in as a supplier, you’ll only see the actions a supplier has access to.

With the selected

" With the selected " dropdown menu provides quick actions:

  • Add to Inventory / Add Inventory Entries — Update inventory levels directly from the list
  • Add to AI Assistant — Add products to the AI Assistant
  • Export selected products — Download a CSV file with the selected products
  • Set to Online / Set to Offline — Change the online status of multiple products
  • Copy — Create a copy of the selected products
  • Search and Replace — Find and replace text in product data
  • Reset Address — Reset the products’ URLs
  • Delete Selected — Delete the selected products

What You Should Know About Each Action

  • "Add to Inventory " and "Add Inventory Entries " both take you to the inventory page for the first selected product. When you save, you’ll automatically move on to the next one, so you can process an entire shipment in a single session.
  • "Export Selected Products " generates the file immediately, while an export of the entire product range is queued. The file has the same format as a standard product export, so you can edit it and import it back. See " Import Products via CSV."
  • "Set Online " also removes any redirects set up for the product, so it can once again be found at its own address.
  • "Set Offline " and " Delete Selected " redirect you to the "Set Up Redirects" page. Here, you can redirect the old product URLs to, for example, the category page, and if you have multiple products, you can redirect them all to the same page at once. It’s a minute well spent, because otherwise, old links and search results will lead to an error page. Read more in the guide to redirects.
  • "Copy " creates a copy within the same store. If you’ve selected only one product, you’ll be taken directly to the edit page for the copy.
  • "Copy to" only works between online stores belonging to the same company. The list shows the stores your user has access to; if the store is missing from the list entirely, it means the user lacks access.
  • "Find and Replace " replaces text in the product name, list description, description, meta title, and meta description of the selected products. See the full guide in the article "Find and Replace in Products."
  • "Reset URL " regenerates the product’s web address based on its name. This is useful after a name change, but the old URL will no longer exist afterward, so set up a redirect if the product has been online.
  • "Delete Selected " first asks if you’re sure.

Copy to Other Webshops

If you have multiple online stores, you can copy products between them using the “Copy to” button. You can choose to automatically create categories, suppliers, and brands, and automatic translation is available if the languages differ.

Categories and Main Category

With the Categories button, you can add or remove categories from the selected products in bulk. The Main Category button lets you set the main category for the selected products. The main category is the category to which the product primarily belongs, and it is used, among other things, for the breadcrumb navigation in the store.

Labels

Add or remove labels from multiple products using the "Labels" button. Labels are useful for organizing and filtering products internally.

Bulk Editing of Fields

Click " Bulk Edit " to open a dialog where you can set the following fields for all selected products:

  • Supplier, brand, manufacturer, security profile
  • Allow negative stock status, delivery time
  • noindex (for SEO), warehouse location
  • Tariff code, customs rate, country of origin
  • Internal search, Google category, weight
  • Purchase price, canonical, custom fields

Read more in the article " Bulk Editing of Products " for a detailed guide to table editing.

Price Changes

With the "Price Changes" button, you can adjust prices for all selected products at once. You can:

  • Set the selling price to a fixed value
  • Adjust the selling price by a specific amount (e.g., +100 or -25)
  • Multiply the selling price by a factor (e.g., 0.8 for a 20% discount)
  • Round the selling price up or down
  • Perform similar actions for the promotional price
  • Remove the promotional price

The price change does not have to take effect immediately. You can schedule it for a specific time, such as the night before a sale. See how in the article on scheduling price changes for a later time.

Related and Similar Products

With the “Related and Similar” button, you can make selected products related to or similar to one another. This saves time compared to adding relationships one product at a time.

Execute, Edit Selected, and Table Editing

At the bottom of the bulk edit bar, you’ll find three important buttons:

  • Execute — Runs the selected bulk edit action. Using the arrow next to the button, you can instead select a date and time and click “Execute Later” to add the action to the Bulk Edit Queue. See the guide on scheduled price changes
  • Edit Selected — Opens the selected products one at a time in the edit page so you can quickly review and edit them
  • Table editing — Opens a spreadsheet-like interface where you can edit multiple fields across many products at once

Set and remove labels directly in the overview

If you’ve created product labels, a label icon appears next to each product in the overview. Click it to see all your product labels; a checkmark indicates which ones the product already has. Click a label to apply it or to remove it. This way, you don’t have to open the product just to change a label.

Your selection is saved immediately, and you’ll stay in the same spot in the list instead of jumping back to the top. The menu closes after each selection, so if you need to add more labels to the same product, just open it again. Labels appear as small colored markers in the product list, and if you click the checkmark on one of them, the label is removed without having to open the menu.

If you’re missing a label, type the name into the search field at the top of the menu and create it right there. It’s applied to the product immediately and is assigned a random color, which you can change under Products > Product Labels. If the name already exists, the label you already have will be used. If you don’t have any product labels yet, the column won’t appear in the overview, so you’ll need to create your first one under Products > Product Labels.

Tips for Effective Product Management

  • Use filters and saved shortcuts to save time in your daily work
  • Use table editing to make quick changes to many products
  • Keep track of inventory with the inventory filter—quickly find products that are out of stock
  • Use the ABC filter to prioritize your most important products
  • Comply with the Omnibus Directive when changing prices
  • You can import products via CSV to create or update multiple products at once

Frequently Asked Questions

I selected everything, but only the first few products were updated. Why?

"Select All" only selects the products displayed on the page you’re currently viewing. If you’re viewing 50 per page, the action will affect 50 products, regardless of how many your filter has found. Set “Show” to 250 per page and run the action one page at a time, or narrow the filter so that the entire result fits on one page.

I can’t see the bulk edit bar at the bottom at all. What should I do?

It’s collapsed. At the bottom of the screen, you’ll see the word “Bulk Edit” with a small arrow; if you click it, the bar will expand again. Shoporama remembers this setting, so it stays expanded until you collapse it yourself. If you’re using a phone, the bar won’t appear at all, so you’ll need to use a computer or tablet.

Can I save a filter so I don’t have to set it up every morning?

Yes. Set the filters as you’d like them—for example, a specific supplier plus “Show only products that are out of stock”—and click the plus button on the far right of the filter row. Give the shortcut a name, and it will then appear as a button in the filter row. The shortcut is saved on the online store, so your colleagues can use the same one.

Can I include the purchase price in the overview?

Yes. Click “Customize View” in the bottom bar, check the box next to “Purchase Price,” and save. You can also enable ABC class, customer group prices, and a number of other columns in the same way. Remember that this setting applies to all users in the store, so your colleagues will see the same columns as you.

How do I find offers that are about to expire?

Use the “On Sale ” filter and select “Offers expiring soon (within 7 days).” If you want the full overview, you can also enable the “Offer Period” column under “Customize View.” This allows you to see both scheduled and expiring offers directly in the list and sort by them.

Can I send a filtered link to a colleague?

Yes. Filters, search terms, and sorting criteria appear in the address bar, so you can copy the address and forward it or save it as a bookmark. The recipient must have access to the same online store. If you use the link often, it’s better to save it as a shortcut using the plus button.

Can I copy products to one of my other stores?

Yes, if the stores belong to the same company. Select the products, open “Copy to,” check the box next to the store you want to copy to, and click “Execute.” You can also choose to have categories, suppliers, and brands automatically created in the other store, and have the text translated if the stores are in different languages.

What happens to the links when I take products offline or delete them?

You’ll be redirected to the “Set Up Redirects” page, where you can point the old product URLs to a relevant page, such as the category the product was in. If you don’t do this, old links from Google, newsletters, and customers’ bookmarks will lead to an error page. If you have many products, you can redirect them all to the same page at once using “Set All To.”

Do you have questions about the product overview? Contact us at support@shoporama.dk.