Scan tickets: Check in at the door
Check guests in using a barcode scanner, your phone's camera, or the guest list, and grant door staff their own access by assigning them the "Door Staff" role.
When guests arrive at the door, check them in under Orders → Scan Tickets. Scan the QR code on the ticket using a barcode scanner or your phone’s camera, and the entire screen will turn green, orange, or red, so you can instantly see whether to let the guest in. For small events, you can instead check off participants on the attendee list. You can read about what check-in is in the glossary.
The scanner is available as soon as you start selling tickets. If you haven’t set up ticket sales yet, start with Tickets: sell events, courses, and trips on fixed dates.
In short: Open Orders → Scan Tickets, select the date, and scan. Green means welcome, orange means caution, and red means stop. The same ticket can only be scanned once, even if multiple people scan it at the same time.
Open the scanner and select the date
- Go to Orders → Scan Tickets. You can also click the scanner icon next to a date under Orders → Tickets or click Scan on the date’s page. This will preselect the date.
- Select the date from the drop-down menu. It displays dates from yesterday through 60 days in the future, along with the time, product, and description.
- At the top, for example, it says “Arrived 37 / 120,” meaning how many people have checked in out of the tickets sold.
Always select the correct date. This allows the scanner to detect a guest who has arrived on the wrong day. If exactly one date is active when you open the scanner, it is selected by default. The drop-down menu also includes “All Dates.” In this case, only tickets for the current date are accepted—calculated from 12 hours before the start to 12 hours after the end—no counter is displayed, and the “Check in the rest of the order ” button does not appear either. If you have two events on the same day, select the date; otherwise, a ticket for one event could be used for the other.
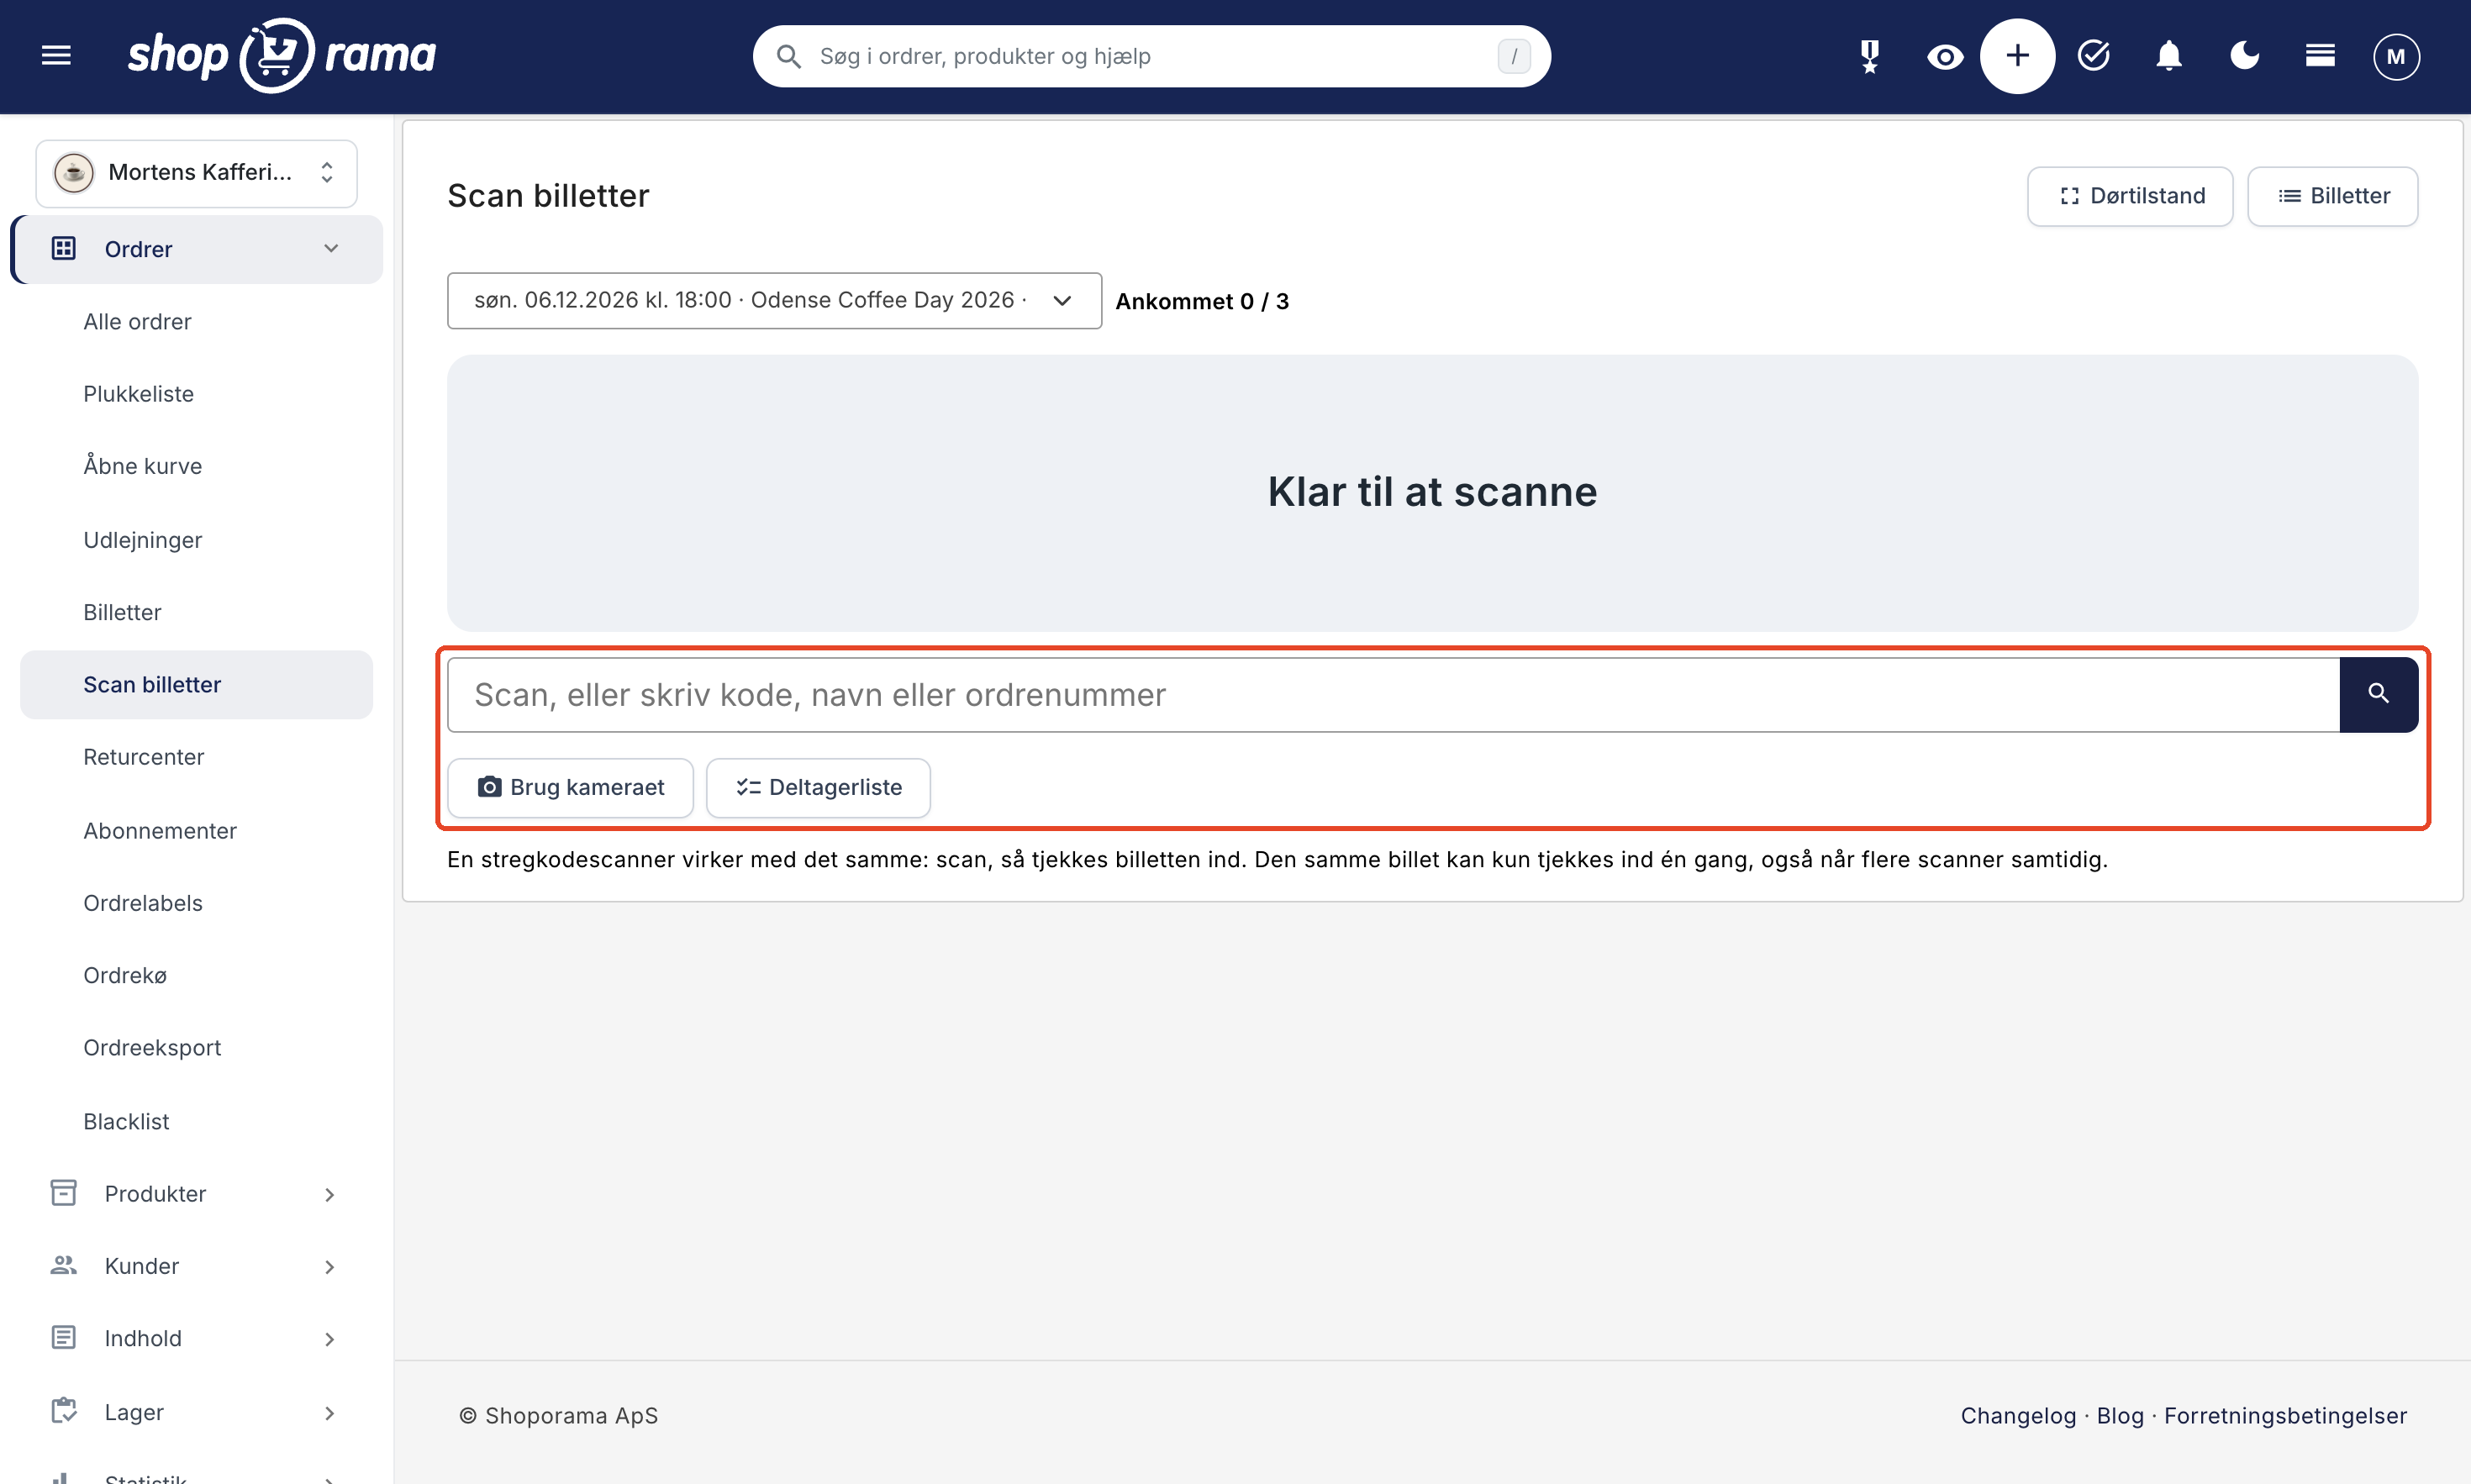
Three ways to check in
With a barcode scanner
A USB or Bluetooth barcode scanner works immediately, just like at the POS: scan, and the ticket is checked in. You don’t need to click anything. On a computer, the cursor stays in the field at all times, so the scanner always reads the correct location. The tickets have a QR code, so the scanner must be able to read QR codes.
With your phone’s camera
Click “Use Camera” and hold the guest’s QR code up to the phone’s rear camera. This happens in the browser, so you don’t need to install an app. The first time, the browser will ask if the page can use the camera: select “Yes.” Turn the camera off again by selecting “Stop Camera.”
By searching
If the code can’t be scanned, type in the “Scan” field , or enter the code, name, or order number. If you enter the entire 12-character code—which is located below the QR code on the ticket—the ticket will be checked in immediately. If you enter a name or order number, you’ll see a list of tickets with a “Check In” button next to each one. Search, for example, by last name or order number.
Green, Orange, and Red
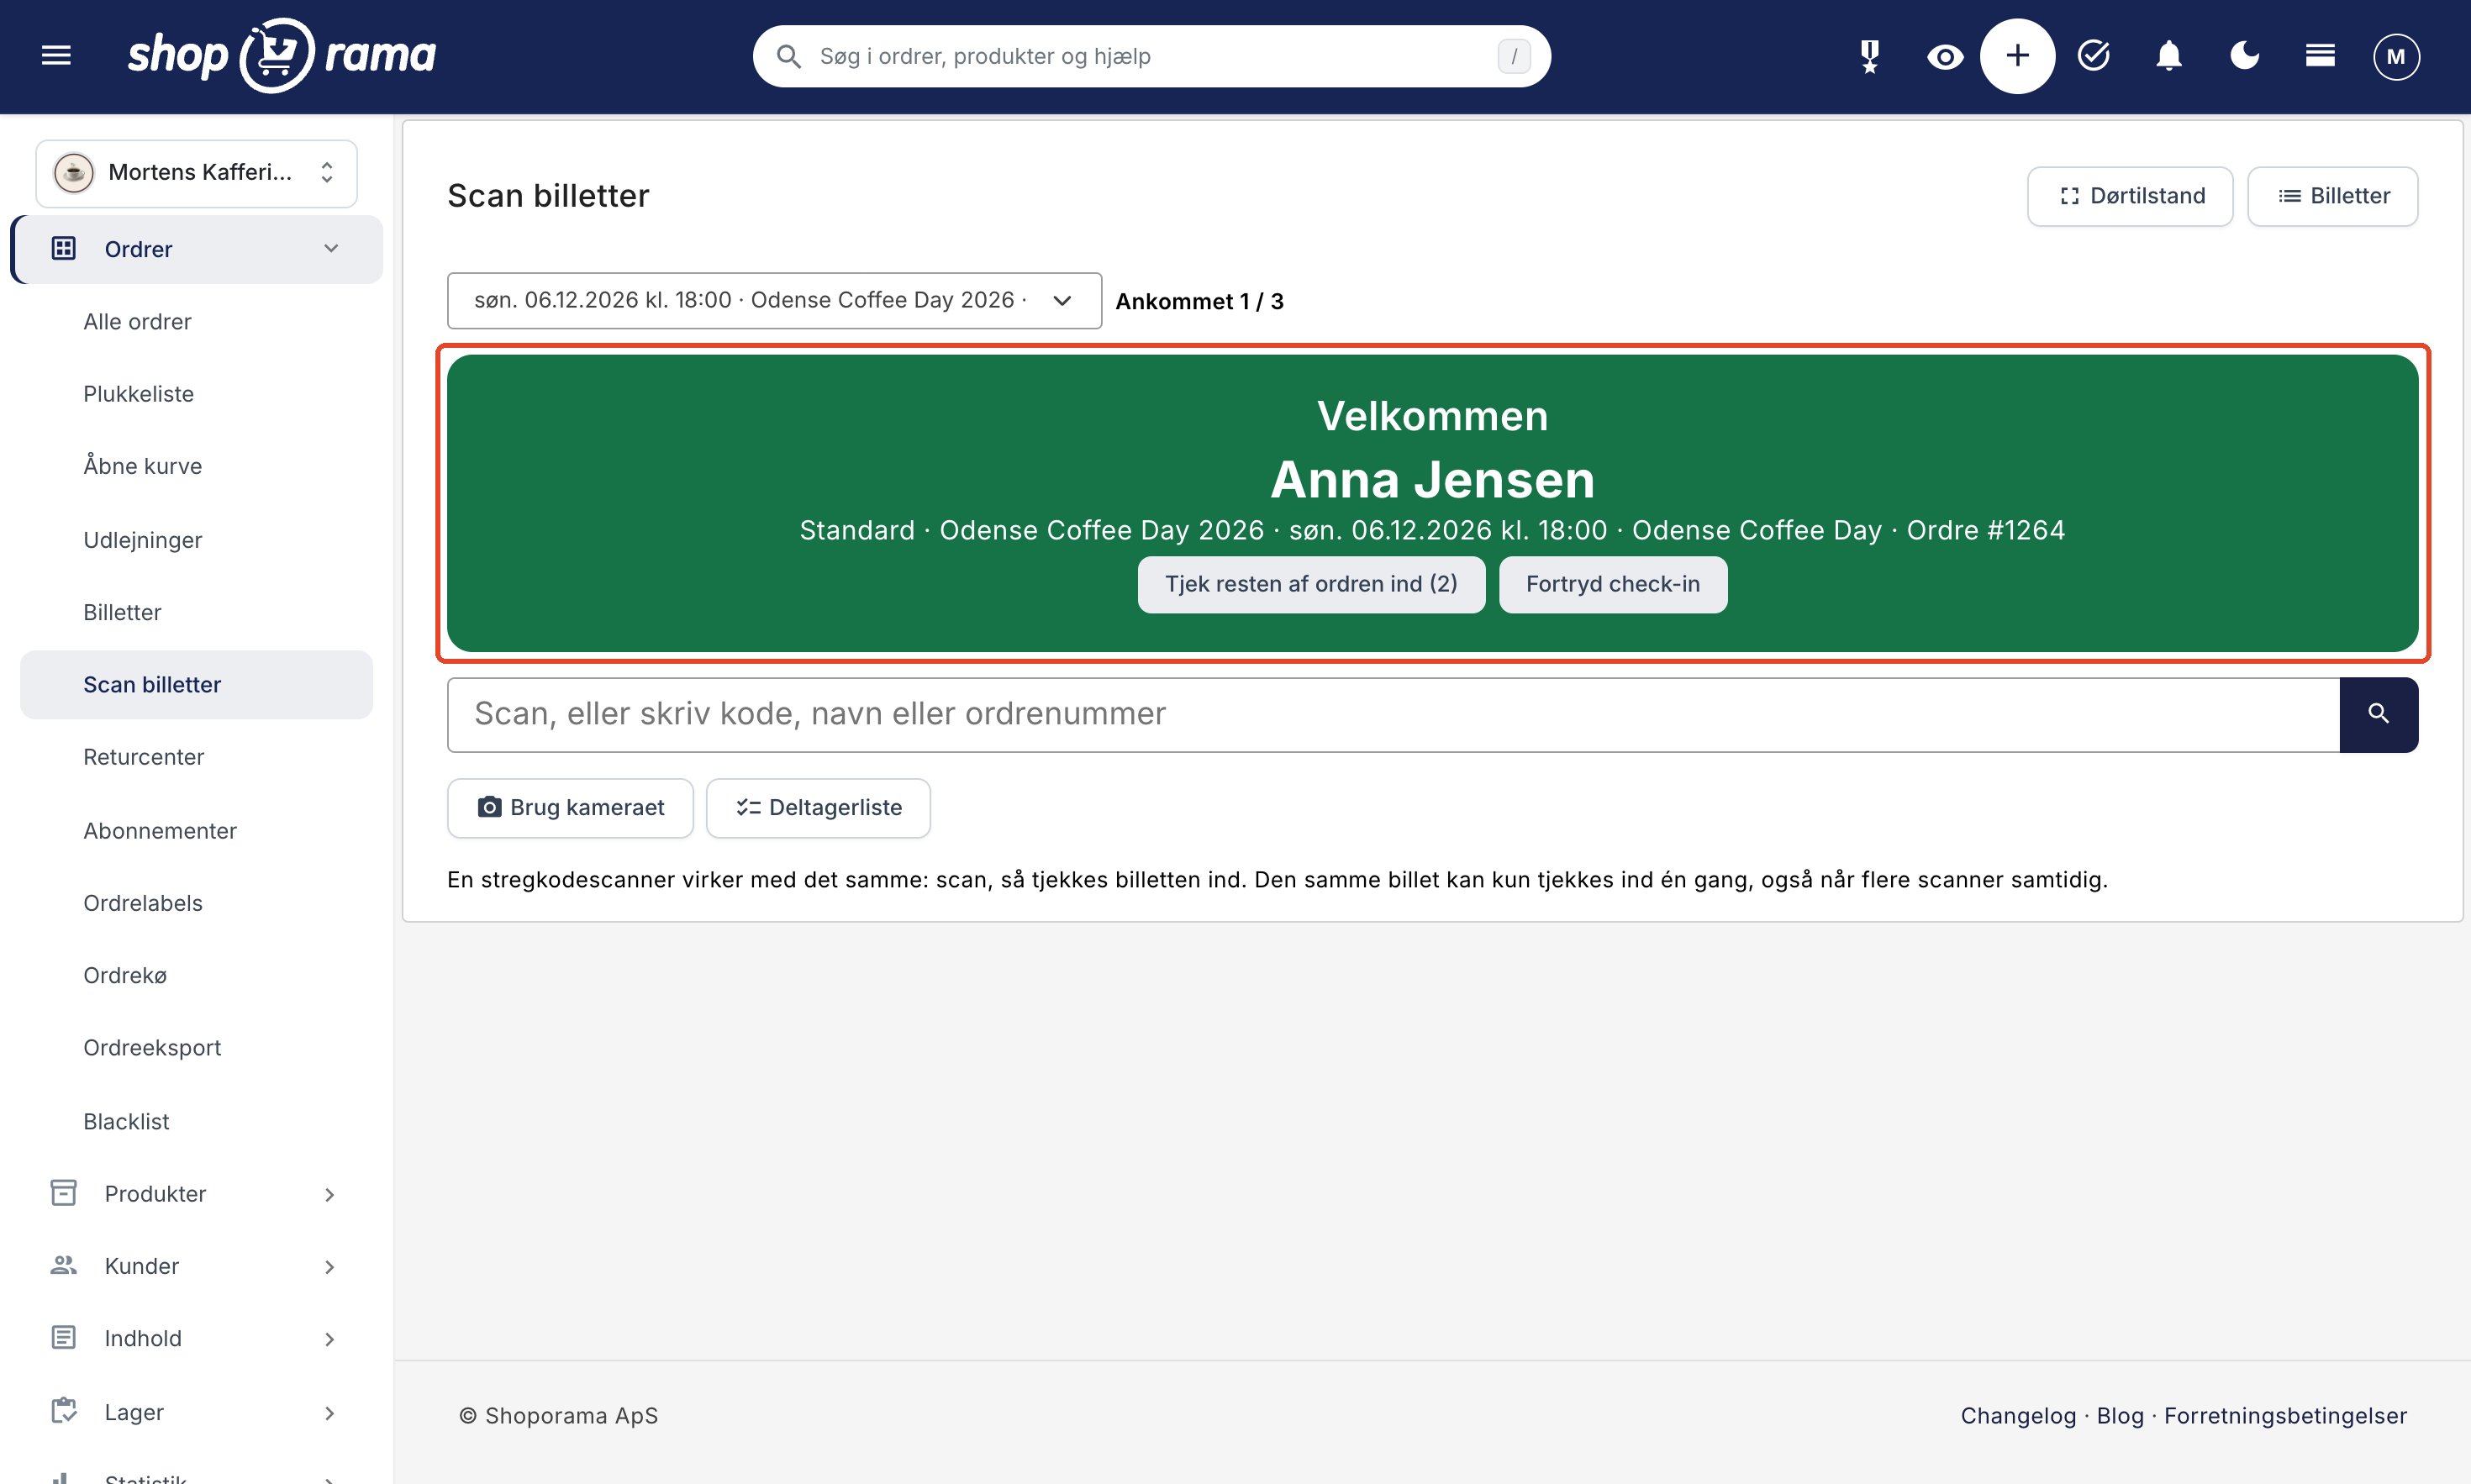
The result fills the screen with color; a beep sounds, and the phone vibrates if it can, so you can keep your eyes on the line. Green, orange, and red each have their own sound. Below the message, you’ll see the participant’s name, ticket type, product, date, and order number.
| Color | Examples of messages | Here’s what to do |
|---|---|---|
| Green | "Welcome" | Let the guest in. The screen will reset itself after about 2 seconds, so you can scan the next one. If the "Check in the rest of the order" button appears, the green screen will remain until you press it or scan the next ticket. |
| Orange | "Already checked in at 7:42 PM by Anna" "The remaining balance has not been paid" | Take a closer look at the ticket. It may have been used before, or the customer may still need to pay the remainder of an installment. |
| Red | "The ticket is valid on Sun., Dec. 6, 2026, at 6:00 PM" "The ticket has been canceled" "The order has been canceled or credited" "The order has not been paid" "The date has been canceled" "Unknown ticket" | Stop. This ticket does not grant access today. |
Orange and red remain on the screen until you tap the screen or scan the next ticket, so no one overlooks them.
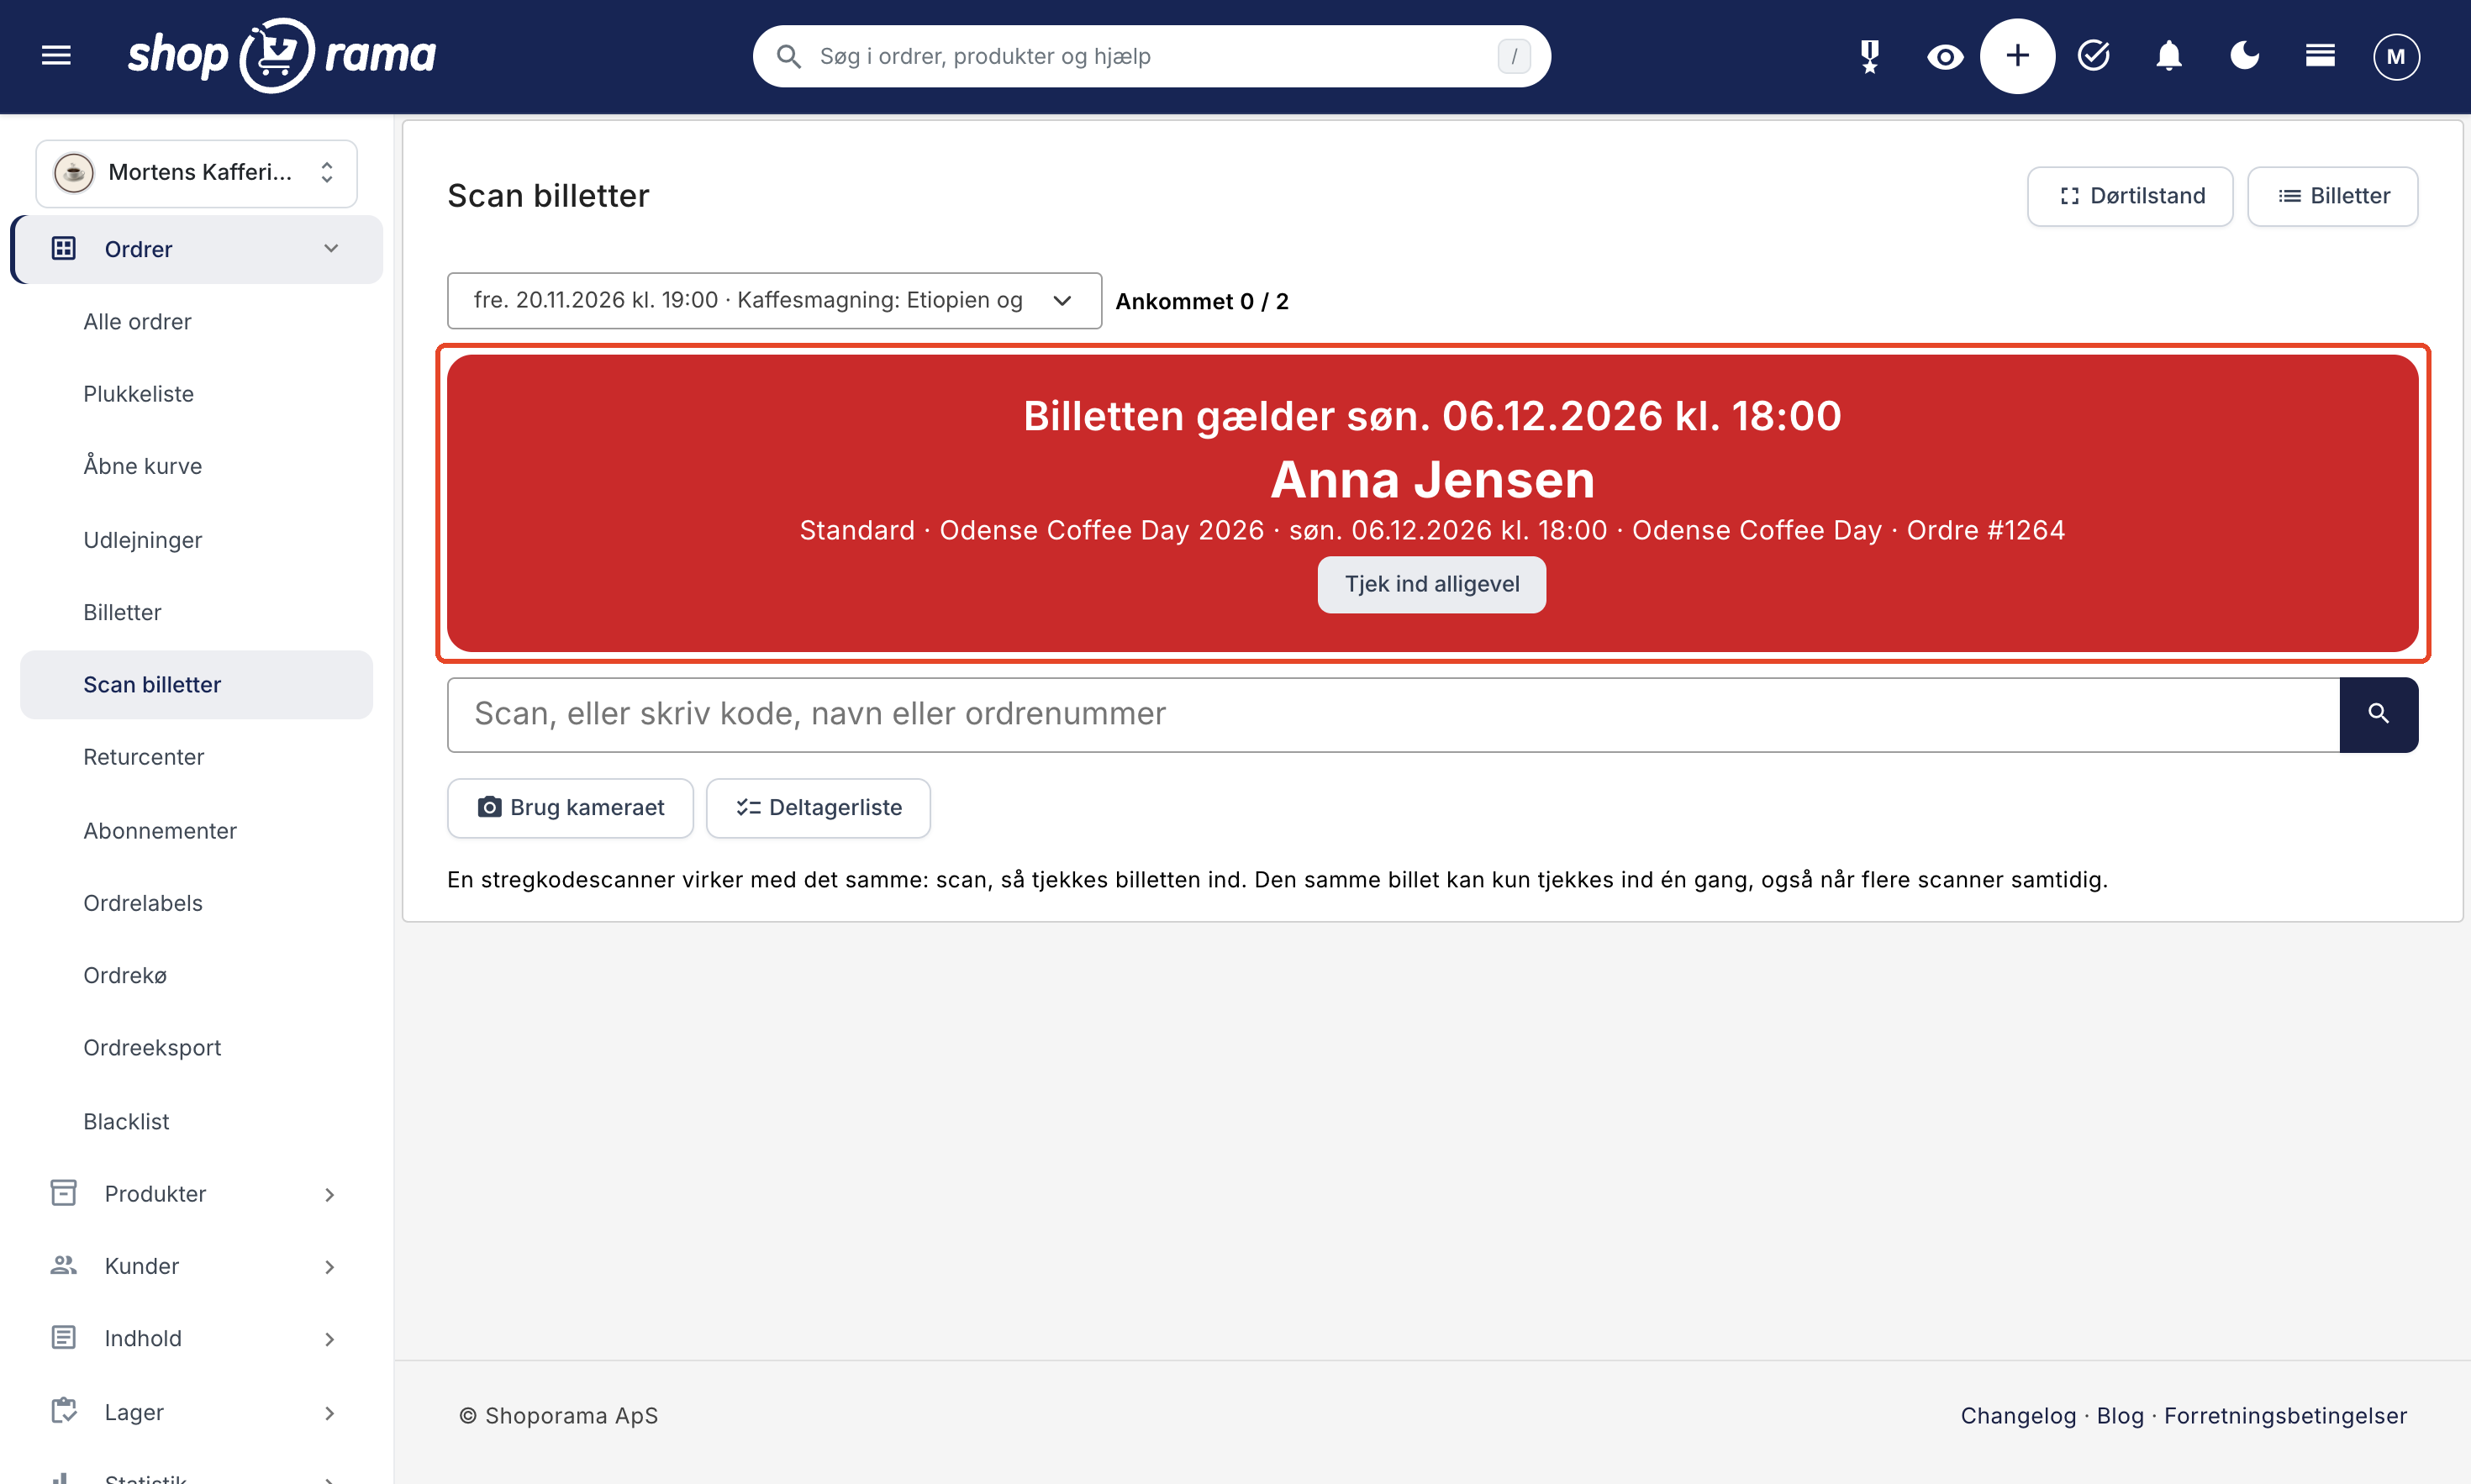
Check In Anyway
Sometimes you’ll want to let the guest in even if something is wrong, such as if they’ve arrived a day early and there’s room. In the case of an incorrect date, an unpaid order, a canceled date, or an outstanding balance, the scanner displays the “Check In Anyway” button. If you click it, the guest is checked in, and a note is added to the order explaining why and by whom. A canceled ticket, a canceled or credited order, and an unknown code cannot be checked in. Users with the “Door Staff” role only see the button when the remaining balance is missing. In the case of an incorrect date, an unpaid order, or a canceled date, a user authorized to modify orders must make a decision.
Groups and Cancellations
- Check in the rest of the order (N): If a family or group is traveling together, scan a single ticket. If the order includes additional tickets for that date that haven’t been checked in, the green screen will display a button showing the number of remaining tickets. One click, and the entire group is checked in.
- Cancel Check-in: If you’ve scanned the wrong ticket, click the button immediately afterward. The screen displays “Check-in Canceled,” and the ticket can be used again. The button also appears when a ticket has already been checked in. The cancellation is noted in the order’s notes.
Door Mode: Full-Screen Scanner
Click Door Mode in the top right corner. This hides the admin menu, and the scanner fills the entire screen so staff don’t accidentally click their way out of it. Door Mode remains active until you click Exit Door Mode.
On a phone, you can add the scanner to your home screen. Open " Scan Tickets " in your phone’s browser, and select "Add to Home Screen" from the browser menu. The icon is labeled "Scan Tickets" and opens the scanner in door mode as an app without the browser’s address bar.
Attendee List: Check In Without a Scanner
Each date has its own participant list. You can find it under Orders → Tickets by clicking on the date or on Participants, or via the Participant List button on the scanner. The page also works well on a phone. It features:
- Counters for Checked In, Seats, Waitlist, and Status.
- A search field for “Search by name, code, order, or email,” which filters the list as you type.
- The “Hide those who have checked in” checkbox, which shortens the list as guests arrive.
- The “Check In” button next to each participant. Once a participant is checked in, the time appears in the “Entry” column along with the “Cancel” button.
- The columns: Participant, Age (when you ask for a birthday), Type, Order, Add-ons, Code, and Entry.
- "Print" generates a checklist for use on paper: one line per participant with a field under " Arrived," a serial number, name, age (when the system asks for a birthday), ticket type, order number, and a column for notes. Participants who have already checked in have a checkmark and the time, and canceled tickets are not included. Excel (CSV) provides a spreadsheet. The export requires the Export add-on on your user account.

Give door staff their own access
All users who can edit orders can scan tickets. If a person is only assigned to the door, assign them the “Door Staff” role. This role grants access to the scanner, attendee lists, and ticket searches, but not to orders, customers, products, exports, or anything else. When a user with this role logs in, they are taken directly to the scanner.
- Go to Company → Users, and click Create New User.
- Fill in the Name and Email Address fields.
- Click the “Door Staff” column in the “Role and Permissions” tab.
- If the company has multiple online stores, select the ones the user should be able to scan in.
- Click Create User. The user will receive an invitation via email and can choose their own password.
Only a company administrator can create users and assign roles. Give each person their own login. That way, the correct name will appear in “Already checked in at 7:42 PM by Anna,” and you can see who checked whom in. Read more about roles in “Roles and Permissions.”
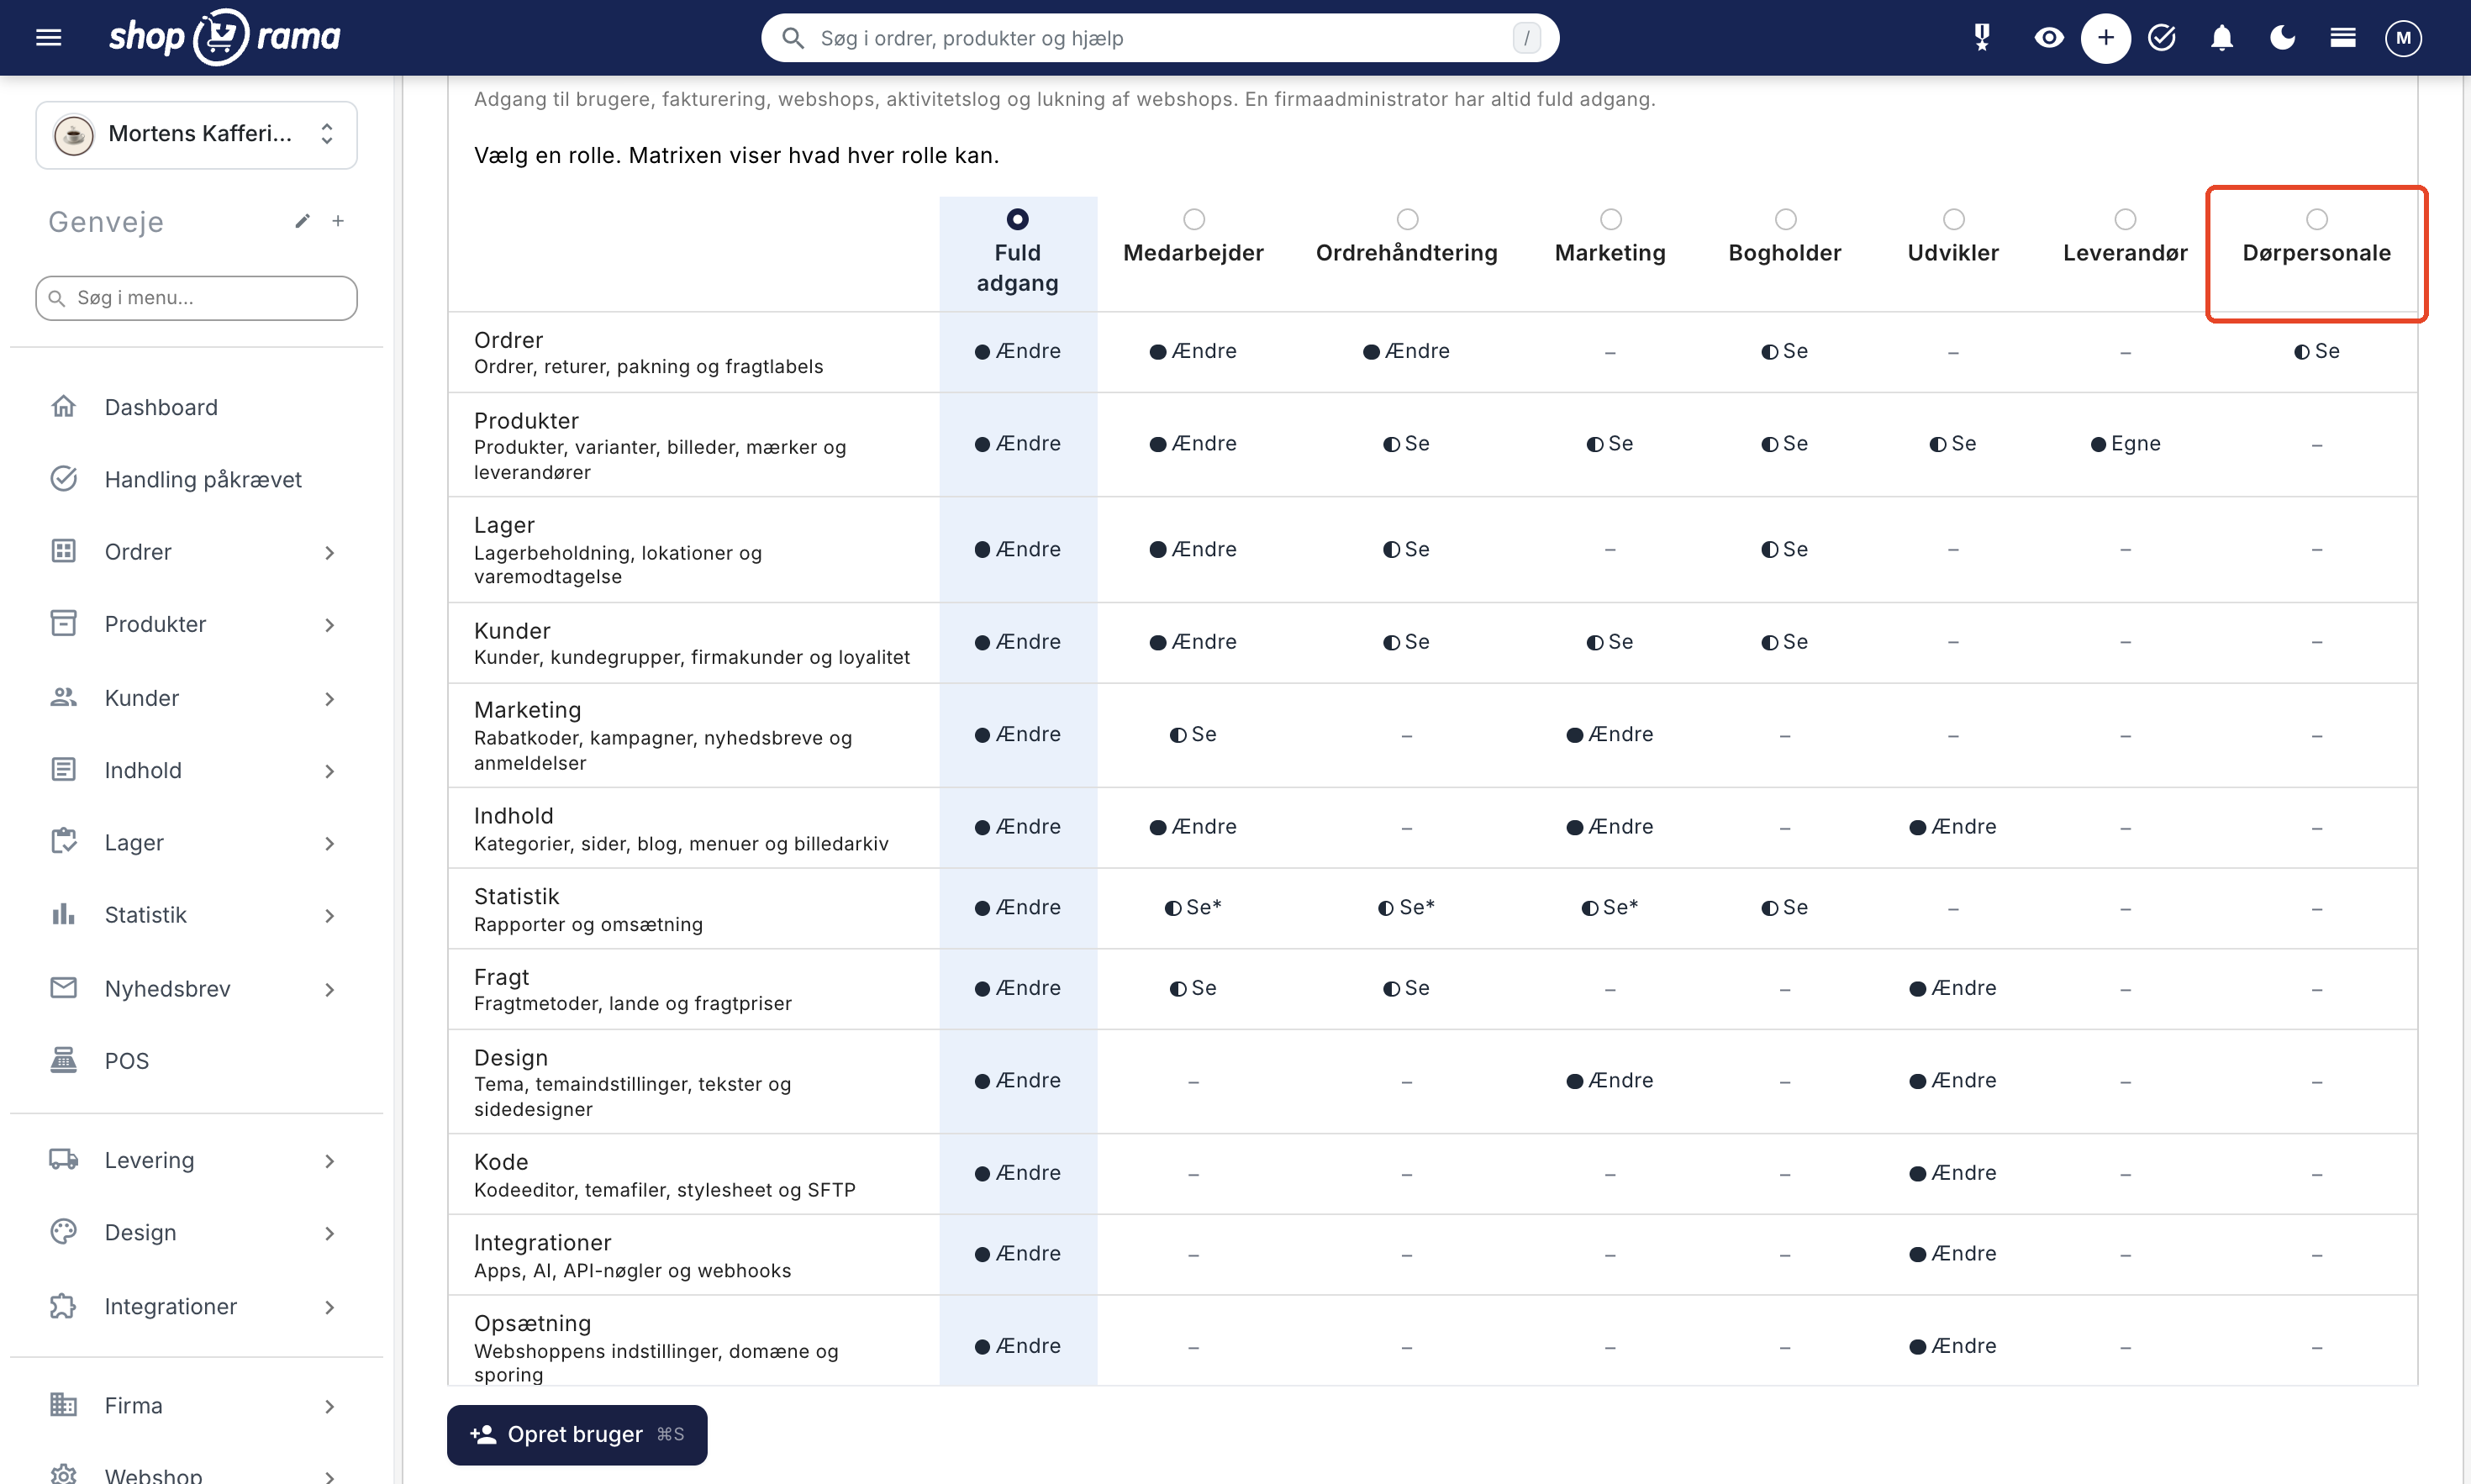
Multiple scanners at the same time
You can scan from as many phones and computers as you like on the same date. The same ticket can only be checked in once. If four people scan the same ticket at the exact same moment, one will see “Welcome,” and the other three will see “Already checked in.” The “Arrived” counter updates every time you scan on your own device.
When the QR code is scanned with the phone’s built-in camera
The QR code contains a link to the ticket. If you scan it with your phone’s standard camera app, the customer’s ticket page will open. At the bottom of the page is the “Check In (Staff)” link. This leads to the scanner in the admin panel, where the ticket is retrieved and displayed with a “Check In” button. The guest is not checked in automatically, and you must be logged into the admin panel.
The scanner requires an
- Internet connection. Each scan is retrieved immediately, so the scanner won’t work without a connection. There is no offline mode. If you lose your connection, the message “No connection. Please try again.” will appear.
- HTTPS. The camera only works when the page is opened via HTTPS. Otherwise, the message “The camera requires the page to be opened via HTTPS” will appear.
- Camera access. If you’ve deniedaccess, the message “Camera access was not granted. Allow camera access for this page in your browser settings” will appear. If the camera is in use, the message “No camera available, or it’s being used by another program” will appear.
- One admin login for each person who scans.
Tips
For large events
- Open multiple entrances and assign each entrance its own scanner, phone, or computer.
- Give each person at the door their own login with the “Door Staff” role.
- Set the scanners to "Door Mode" and select the date on each one.
- Test on-site the day before: create a test booking, scan the ticket on each scanner, click “Cancel Check-in,” and then cancel the test ticket on the booking so the seat becomes available. At the same time, check that there is an internet connection at the entrances.
- Print the attendee list using “Print as Backup” in case the connection fails.
For small events
- If you have 10 to 30 participants, the participant list on your phone is often sufficient. Tap “Check In” next to each person as they arrive.
- Check the box next to “Hide those who have checked in” so you only see those who are still missing.
- If you prefer paper, print the list and check them off. Afterward, you can check them in on the list if you want to keep track of the numbers.
Frequently Asked Questions
The QR code on the guest’s phone can’t be scanned. What should I do?
Enter the 12-character code located below the QR code into the scanner’s field. You can skip the hyphens. If the guest doesn’t have their ticket handy, search by last name or order number.
A guest says they bought a ticket but can’t find the email. How do I find them?
Open the Participant List and enter the name or email address in the search field. The list searches for the participant’s name, the purchaser’s name, email, code, and order number. If they’re on the list, tap Check In.
Can two people enter with the same ticket, for example, using a screenshot?
No. The second time the ticket is scanned, the screen turns orange and displays “Already checked in” along with the time. This also applies if the ticket is scanned at two entrances at the same time.
Can guests leave and re-enter during the evening?
The scanner does not have a specific re-entry function. If you scan the ticket again, the screen will turn orange and display “Already checked in at …,” and it’s up to your own rules to determine whether the guest is allowed in. If you want to use a stamp or wristband for re-entry, do so separately.
Can I use the barcode scanner I have for my POS?
Yes, if it can read QR codes. Many basic scanners can only read standard single-line barcodes, and they can’t read the tickets. The scanner doesn’t need to be set up: it enters the code into the field, just like in the POS.
What can the door staff see?
The scanner, the overview of dates, and the participant lists with names, order numbers, and add-ons. They cannot see the buyer’s phone number, email, or the waitlist. They cannot open orders, view customers, products, or sales figures, export lists, cancel dates, message participants, or check anyone in anyway—even if the date is incorrect, the order hasn’t been paid, or the date has been canceled.
Can we see afterward who checked whom in and when?
Yes. The participant list and the order’s “Tickets” tab show the time, and if you hover your mouse over it, you’ll see the name of the person who checked in. The Excel file includes the check-in time. “Check in anyway” and “Cancel check-in” are also recorded in the order’s notes along with the name.
Does it count as paid if we check in a guest even though the balance hasn’t been paid?
No. Check-in does not affect payment. The remaining balance must still be paid via the payment link, and you track it on the order as before. A note is added to the order stating that the guest was checked in despite the outstanding balance.
Can I use my iPad or my old phone as a scanner?
Yes, as long as it has a camera, a recent browser, and an internet connection. The scanner runs in the browser, so you don’t need to install anything. Log in to the admin panel on the device, open Orders → Scan Tickets, and click Use Camera.
See also
- Tickets: Sell events, courses, and trips on fixed dates
- Installment Payments: Deposit Now, Pay the Rest Later
- Roles and Permissions
- Create multiple users in your shop
- Check-in (glossary)
If you have any questions about the scanner, feel free to email support@shoporama.dk at any time.
Related articles
Tickets: Sell events, classes, and trips on specific dates
Set up ticket sales with dates, seats, and ticket types. Customers select a date on the product page and receive a ticket with a QR code for each...
Installment Payment: Pay a deposit now and the rest later
Here's how to let customers pay a deposit when they book and the remainder later via an automatic payment link. For trips, courses, rentals, and...
Create more users in your shop
A guide to creating multiple user logins for your Shoporama admin panel and assigning each user a role that determines what they can do.
Roles and Permissions: Give Each User the Right Access
See what the eight roles and five optional features provide access to, which role is right for whom, and what only the company administrator can do.
Related features
Ticket
A ticket grants access to an event, a class, or a trip on a specific date. Learn about seats, ticket types, QR codes, and ticket sales on Shoporama.
Ticketing System in Your Own Online Store
Sell tickets for tastings, classes, concerts, and trips through your own online store. Dates with available seats, QR tickets, check-in via phone,...
Check-in
Check-in is when a guest's ticket is scanned at the entrance and marked as used. Here's how to check guests in using a scanner or phone in Shoporama.
Ticket Sales
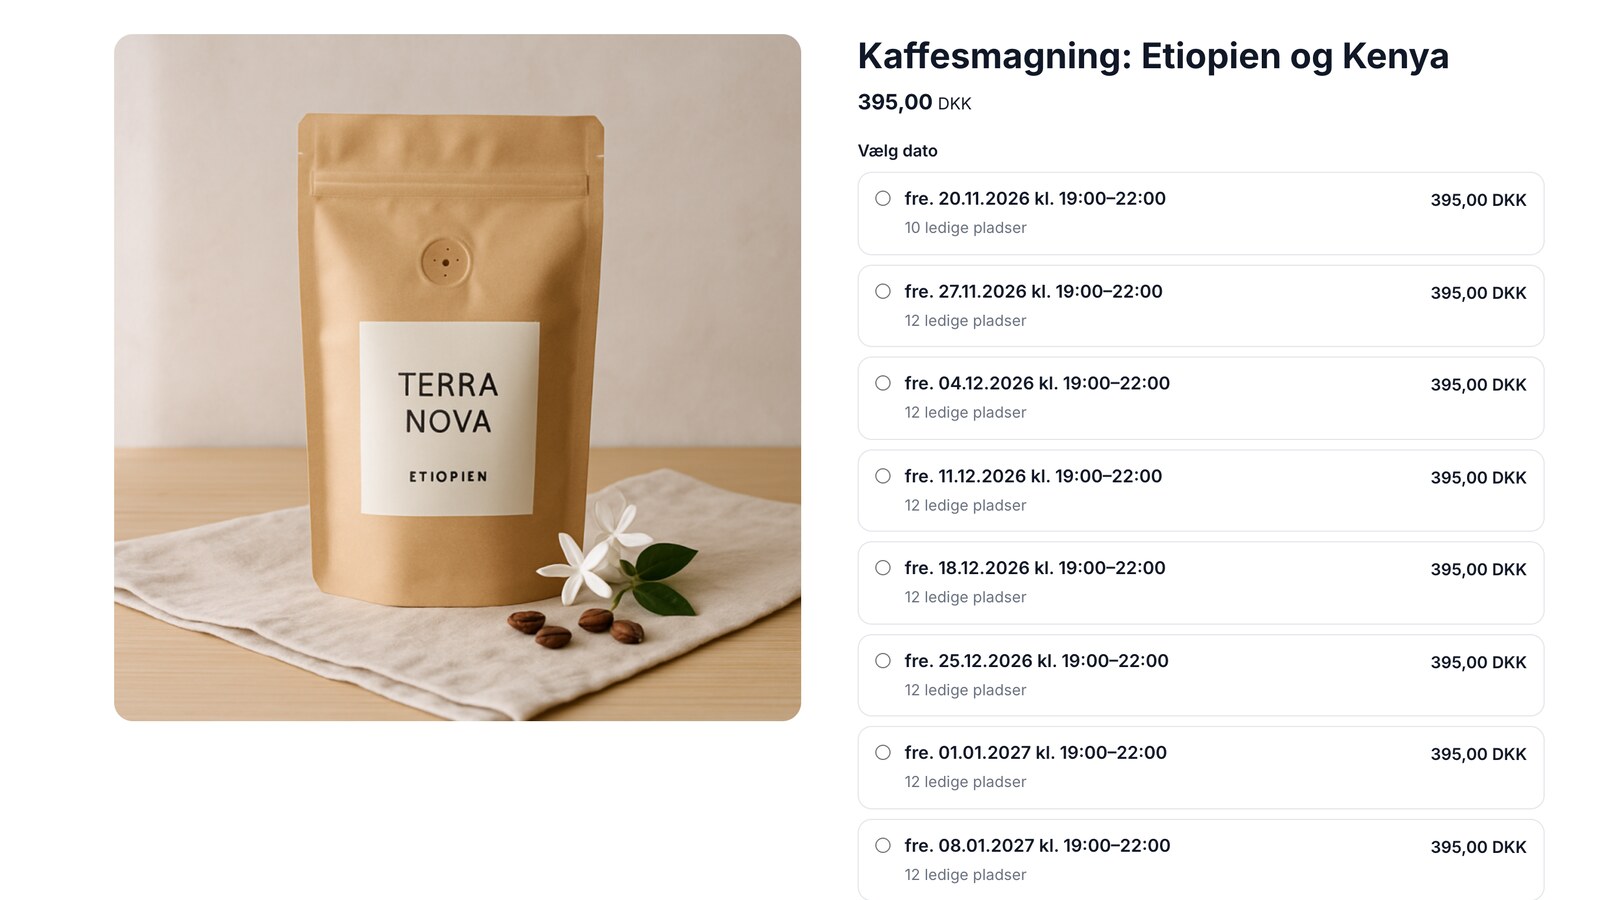
Sell tickets in your own online store, in the same shopping cart as your products
Sell tastings, classes, and trips in your own online store: tickets and merchandise in the same shopping cart, QR tickets via email, check-in using...
Buy tickets: dates, seats, and check-in at the door
Learn how to sell tickets in Shoporama: enable the "Tickets" feature on a profile, add dates with available seats, test the purchase process, view...